Thursday 28 February 2013

Essie Leading Lady Swatch

I hereby claim that No Buy February is over. It's done. I think I did pretty good with not buying any polish. I did cave a few times but such is life. I also said I would actually stop buying polish altogether if my Rubbermaid storage container filled up... Although now that it has, I am looking for other storage solutions and am tempted to get one of those IKEA Helmers.

Today I've got another polish that slipped through my No Buy. I was eye-ing Essie's Leading Lady from the get-go in December. Complete lust. I saw it a few times and then soon it just became harder and harder to find. I found this one at Save On Foods. I am thinking that it might be a limited edition release but I'm not too sure! I couldn't find any availability information on Essie's Winter Collection 2012. In either case, Leading Lady is a deep seductive bold red jelly, packed with silver glitter that gets completely overtaken and swallowed into a cohesive red abyss. This just screams burlesque to me; I love this polish just as much as I thought it would. Leading Lady is meant to be worn alone, not as a layering polish. The base red jelly is very deep and I reached full opacity in two coats. The finish is unfortunately dull and even a little too bumpy from the glitters for my taste but it's nothing a little bit of Seche Vite won't fix.

Essie Leading Lady Swatch

Essie Leading Lady Swatch

Another reason why I was so drawn into Essie Leading Lady is because of its name. I wear a pretty mean set of Jeevice retro-inspired glasses and when I was buying them, the salesman told me that the frames are referred to as "leading lady". Now unfortunately I was unable to find any actual backing reference to this but oh well. Still cool.

Wednesday 27 February 2013

OPI Teenage Dream Swatch (+Bonus OPI Black Shatter Swatch)

Is it too late for this kind of thing? I hope not. Let me tell you about my special relationship with these polishes. Just as you're probably sick of this trend, I am as well but this is what started this whole mess. This was my "Gateway Polish". Before I owned glitter, pinks, shimmers, flakies, neons - the only nail polish that I would ever don is black. In 2010, I owned a whopping total of 4 bottles of nail polish - all black. That's it. The most experimental thing I would wear other than plain black nail polish would be matte black nail polish. The first time I saw OPI Black Shatter, it changed my world. I could wear black nail polish over ANYTHING.... And so I did.

From the 2011 OPI Katy Perry Collection, OPI Teenage Dream is an eye candy saturated with rose pink micro glitter and holographic hex glitters. Don't be fooled, this is not a layering polish. The base rosey pink jelly is thick and you get full opacity and coverage after two coats. Application is smooth but over time, the formula thickens. I am done to the last third of the bottle; I still haven't been able to thin mine out after 10 drops of OPI lacquer thinner but I was able to apply it without any major problems. A fresh bottle will give you a quick drying flawless application. Here's two coats of a 2 year old lacquer, with Seche Vite top coat.

OPI Teenage Dream Swatch

OPI Teenage Dream Swatch

Here's OPI Black Shatter. This is my second bottle. I shamelessly wore it on EVERYTHING when it first came out. My first bottle got decent mileage but at midpoint, the bottle dried up and I started a new one. A few notes on shatter polish: 1) It's best applied on an even surface. If you're wearing glitter, it's best to put on a top coat or clear polish first; 2) It dries pretty dull. Be prepared for yet MORE top coat!; and lastly but certainly still important 3) Application needs to be quick with no painting over spots. One generous coat is all it takes. The shatter effect will also "break" in the direction of the application so you can have fun with diagonal, horizontal breakage as well. Here's one coat of OPI Black Shatter with no top coat:

OPI Teenage Dream with Black Shatter Swatch

And of course, the final and finished product:

OPI Teenage Dream with Black Shatter Swatch

I don't know about you but I still get hard nostalgia feelings when I see this polish. As if it was a first love or something. Then again, I also have remorse as this will forever be the gateway that resulted in me owning over 220 (and counting) polishes in 2 years.

Tuesday 26 February 2013

American Apparel Violet Panache Swatch

It's Cheap Polish Tuesday and today we've got one of American Apparel's beauties on deck. I don't recall exactly how much I paid for this polish, which sort of makes it iffy if it should make "Cheap Polish Tuesday" with the requirements that the polish must be able to be found for $5 or less. While I know that American Apparel polish can be found in deals of 3 for $15 (yup, $5 each - it makes the cut!), I have seen the prices vary greatly between regions. On the American Apparel website for Canada, the price per bottle shows as $9 each, and no discounts in multipliers. (For the record, I don't remember paying that much, I bought this over a year ago.) Whilst in the US, the polish is listed at $6 each and you can get 15-20% discount if you buy more than 3. In either case, if you are patient, American Apparel often have promotions of free or discounted polish.

American Apparel Violet Panache is from the "Metallic" line but I don't really think it looks that metallic, it's just a simple shimmery, micro-glitter finish. It is a slight duochrome but I might be blind and the difference between the royal blue and the blue-biased cool violet doesn't seem to offer much contrast. The formula is VERY sheer and while I used 3 coats to make full opacity, you could easily find a one coat black and use one coat of Violet Panache to get the duochrome effect. The brush was meh, no real complaints but because of the height of the bottle, it made for a long brush and short handle. Not too difficult to work with but not my favourite.

American Apparel Violet Panache Swatch

In either case, for the price it's OK. If you don't have a colour like this, I don't see anything wrong with the colour to have a sour impression. If you dig the colour and the price is right, I'd go for this one but at $9 a pop like on the American Apparel Canada online store? No thanks.

Monday 25 February 2013

DAVIDsTEA Perfect Mug Inspired Nail Art - Holly Red Winter Tree and White Budding Tree

I hope all of you enjoyed the Oscars on the weekend. I personally wasn't surprised at any of the winners, but I am so glad that Anne Hathaway won for her role in Les Miserables because she nailed that performance. Absolute perfection.

Anyway back to nail business, specifically Shitty Nail Art Monday featuring some more art based on DAVIDsTEA Perfect Mugs. I was going to make this into two separate Shitty Nail Art Monday entries but I was way too slow on uploading these and the mugs I've chosen are slowly disappearing off the website. So today I'm posting a 2 in 1!

First on the plank is the Holly Red Winter Tree. If my life wasn't already full of mugs, I would probably be close to getting this one for myself. For some reason, I am really into trees that take over the whole canvas. My shower curtain is just a giant tree. For this, I used Joe Fresh Cherry as the base and then used a generic white striper to free hand the branches. Yes, my freehanding needs quite a bit of work.

DAVIDsTEA Perfect Mug Inspired - Holly Red Winter Tree

Second up is the White Budding Tree - this one is still up on the website to see. I don't really like this one. I think it's really sloppy. Anyway. As a base, I used OPI White Alpine, OPI Mermaids Tears for the branches and OPI Jade is the New Black for the leaves.

DAVIDsTEA Perfect Mug Inspired - White Budding Tree

Anyway, that's all I've got for my DAVIDsTEA Perfect Mug nail art. I am going to try and do other nail art until more DAVIDsTEA Perfect Mugs come out, so Mondays will go back to regular swatches, or if I am adventurous enough, other nail art adventures!

Thursday 21 February 2013

OPI Polka.com Swatch

I was watching Arrow last night while doing some swatching and I was pretty sure I was going to leave on my professional manicure polish until it chipped off but I just couldn't stand it anymore! Ah well. I was going to continue to burn off the backlog but after I swatched OPI Polka.com from the newest Euro Centrale collection, I seriously can't contain myself!... Urge to share... Rising... This is the polish that also broke my No Buy February once I spotted it so let's make it all worth it! Anyway, I am actually sick right now too so sharing this with you will also cheer me up.

OPI Polka.com is a layering glitter polish - a rich mix of cool purple, teal blue and pink hex glitters with smaller cool purple glitters to help support but not overwhelm. I loved this polish since I saw the silly CGI rendering of the bottle in the press release. I was a little worried it would be like OPI The Living Daylights where it sort of falls flat, but I think the smaller glitters in Polka.com offer a little more dynamic. The colours also work together seamlessly.

The formula is not stubborn and the glitter applies evenly, with no issues. Only once coat is needed to get all the swatches below, which I feel is more than enough. On one note, I think the name of this polish is so revolting, haha! The pun is so terrible. Honestly despite the stupid name, at least the polish isn't a bad joke.

Here is one coat of OPI Polka.com over top Cult Nails Time Traveler:

OPI Polka.com Swatch (Over Matte Cult Nails Time Traveler)

And here's the same combination, matte-ified using Gosh 'Matt Effect' Top Coat:

OPI Polka.com Swatch (Over Matte Cult Nails Time Traveler)

OPI Polka.com Swatch (Over Matte Cult Nails Time Traveler)

I had to keep going so here's OPI Polka.com over top of Essence Oh My Glitter!:

OPI Polka.com Swatch (Over Essence Oh My Glitter!)

And again, making everything matte with Gosh 'Matt Effect' Top Coat:

OPI Polka.com Swatch (Over Matte Essence Oh My Glitter!)

OPI Polka.com Swatch (Over Matte Essence Oh My Glitter!)

This polish was also begging for a jelly sandwich. After having problems with Revlon Girly, I've been thinking on and off about how to improve my lacking love for it. A jelly sandwich was one of my ideas and I applied it with OPI Polka.com using OPI Care to Danse? I started with three coats of Care to Danse? for my base, one coat of Polka.com and then another single coat of Care to Danse? to seal in the jelly sandwich. I absolutely love this look and it actually sort of reminds me of Rainbow Honey Sweet Talk!

OPI Polka.com (Jelly Sandwich) Swatch

OPI Polka.com (Jelly Sandwich) Swatch

Making this jelly sandwich makes it entirely super milky! I love both looks, but unless the other two combinations, I think I am still digging the glossy one in this case.

OPI Polka.com (Matte Jelly Sandwich) Swatch

OPI Polka.com (Matte Jelly Sandwich) Swatch

Sorry for the picture spam (but again I'm not sorry, hehe)! I absolutely LOVE this polish and I have no regrets letting this one slip through my No Buy February. I've also been trying to be better on this blog about offering more dynamic combinations and looks for polish. I'm a little over two months into running Claw of Cthulhu and still looking for ways to improve my swatches, photography, and nail care. All in all, I'm having a good time so that's all that matters.

What do you think of OPI Polka.com? Was it worth breaking a No Buy February? What do the kids say about stuff like this? YOLO or something? Ha!... Anyway, off to bed to rest this sick chest of mine... Until next week!

Wednesday 20 February 2013

Zoya Wednesday Swatch

I swear I wasn't planning on doing this but it happened... I'm sharing Zoya Wednesday on a Wednesday! I'm still sporting the holographic polish (albeit a ton of tip wear) from my first professional manicure so I am still burning through the backlog here. I'm excited to swatch with these refined nail shapes! Perfectly round now, different from my usual natural squoval.

So here's Zoya Wednesday, a really gorgeous, and ever so slightly dusty turquoise creme. Definitely a little more green leaning than blue in person but still a wonderful creme. As with any Zoya polish, I definitely favour their brush - shorter and wide, allows for better control for me. I know this type of brush isn't for everyone but it's what works for me. I prefer a shorter brush! Zoya Wednesday can probably be applied in two coats, but again, one of my application problems is to paint over the same spot more than a should, resulting in patches so I applied 3 coats to ensure a full opaque coverage.

Zoya Wednesday

I am so glad I decided to follow my instincts on this one because it's my favourite colour (that I tend to buy a lot of) and it captures the essence of everything a creamy turquoise should be. While not vibrant and bold, this seeks a more subtle playful look instead. The only thing I find weird about this polish is its name! Why Wednesday? I kind of wish that it had a better name because I am reminded of the Addams Family and Wednesday would never wear this polish, ha! Anyway if anyone knows why Zoya picked Wednesday for the name, please enlighten me.

And as a bonus, did I mention it's fantastic for that Hello Kitty fauxnad stamp that I love so much?

Zoya Wednesday

Disclaimer: You'll probably see this stamp a lot on this blog.

Tuesday 19 February 2013

Revlon Girly Swatch

Woot! It's Cheap Polish Tuesday where I explore nail polish for $4 or less! Revlon barely makes the cut but I need fodder so I'm going to roll with it. Today I'm looking at Revlon Girly from Bubble Gum Days Urban Nights, a collection that in spirit sports a lot of great colours and staples for anyone with a smaller polish collection looking for more diversity.

I found out about Revlon Girly from Instagram. Coincidentally, it's where I discovered Manicure Addict, one of my favourite nail bloggers. I fell in love with her find and swatch immediately so I needed to find it for myself. Unfortunately, I live in Canada which has the short straw on polish releases. We seem to be the last for everything! It took me probably about 2 months to finally find my own bottle of Girly. (Thanks to my Canadian homegirl Chantal over at Chantal's Corner for the tip!)

From the bottle, Revlon Girly is something that really caught my eye. It looked like everything I love!: a saturated mix of big and small glitter coloured in violet, pink and copper swimming in a (what looked to be) purple-pink jelly. Revlon, you little genius! You're taking after an "indie" look! Guys, I wanted to love this nail polish. I wanted to so bad. But then I put it on. 3 coats of Girly, topped with Seche Vite:

Revlon Girly

I've never had any luck with Revlon nail polish's formula. I find it so slow drying. The application was OK. Average, nothing to really complain about. The fact that no glitter placement was needed was good - but the slow drying formula always manages to drive me nuts.

Never mind the formula, the base jelly colour looked awful against my skintone. The purple-pink jelly had betrayed me and instead looked dirty, or spoiled. It just didn't look the way I had wanted it to. After 2 months of searching, I was so upset that I couldn't make it work. It's just not made for my skintone. Because the jelly colour is light enough to apply a base colour underneath, I tried to layer Revlon Girly over OPI Planks A Lot.

Revlon Girly (over OPI Planks A Lot)

Slightly better? Maybe I need to revisit the pinker side of the purple-pink base jelly and put it over a pink. For now, I am just going to let this marinate for a bit until I can get excited over this polish again.

I want to love this polish! I am going to love this polish. Just give me time.

Monday 18 February 2013

DAVIDsTEA Perfect Mug Inspired Nail Art - Noble Mustard

Yayyy! It's Shitty Nail Art Monday where I, a complete n00b to nail art attempts to do interesting things with nail polish! I am currently working on a DAVIDsTEA Perfect Mug inspired nail art collection and I really should have posted this sooner as it looks like the mug it's inspired by is no longer available on the site! Damn.

This is inspired by DAVIDsTEA "Noble Mustard" Perfect Mug. It was white on the exterior, and a yellow mustard on the inside. Very awesome! It reminded me of Louboutin's famous black and red heels, which of course, spawned Louboutin nails. You paint your nails one colour, and then paint the inside of your tips a highlight colour. Sounds simple? It is and it's a classy look. I love them. I'm just not a fan of the removal.

So here's my DAVIDsTEA Noble Mustard Louboutin nails: I used OPI White Alpine for the main outside of my nails (coincidentally I am also sipping on DAVIDsTEA Alpine Punch right now)and Color Club Almost Famous for the inside of my tips.

DAVIDsTEA Perfect Mug Inspired - Noble Mustard

DAVIDsTEA Perfect Mug Inspired - Noble Mustard

You can tell these have been sitting in my backlog from January since the white background is still in use here. Whoops!

Friday 15 February 2013

Rainbow Honey Sweet Talk Collection Swatches and Review

Thank eff it's Friday! I know it was a short week but for some reason, I'm already ready for the weekend. Anyway, I've been excited to post this for a while, but today I'm doing one HUGE mega post on Rainbow Honey's Sweet Talk Collection. YES! So I was introduced to Rainbow Honey a little late on the bandwagon. I found Dee's polishes through Reddit's /r/redditlaqueristas and I believe it was Kyoti who mentioned there was a My Little Pony polish collection coming out. I didn't care who made them, I just wanted me some PONY POLISH! Little did I know, Rainbow Honey is made with some real quality, passion and love put into the products. With that said, I can only hope I can put some effort and love into my Rainbow Honey swatches. So let's go. This post has 20+ images so BE WARNED!

When I opened my Rainbow Honey nail mail, I was surprised to find the packaging. Last time I made a huge order, all the bottles were in separate boxes. My Sweet Talk (and The Yokai but we'll get to that some other time) had some in one very cute, very fitted box package. The box was made of quality stock, and top notch printing.

Rainbow Honey Sweet Talk Collection Packaging

Rainbow Honey Sweet Talk Collection Packaging

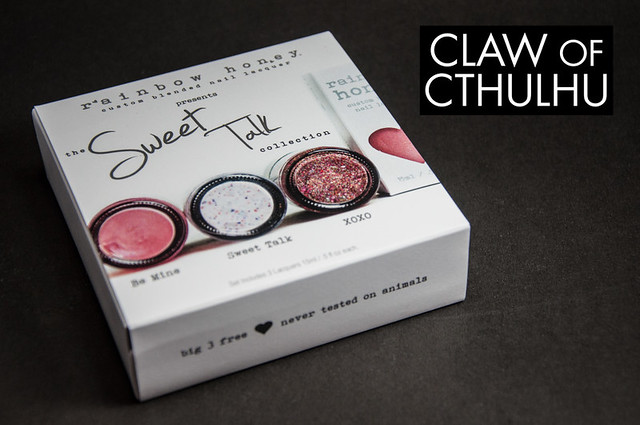
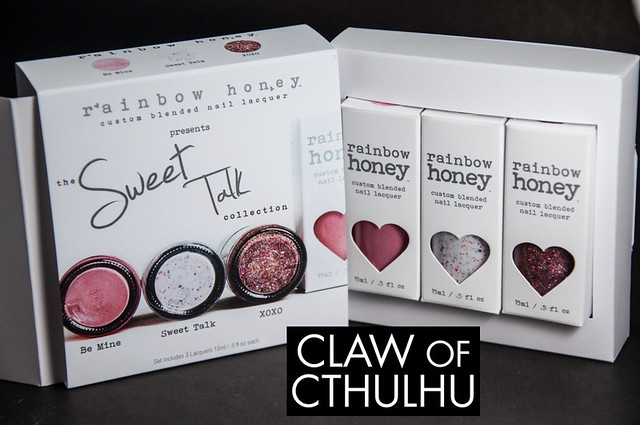
Once I opened the shrink wrap and slid off the sleeve, it revealed an enclosed slight gloss card stock white box with "Rainbow Honey" in a holographic print. Very pretty. Once that box was open, the familiar individual bottle boxes were cozy and tucked into a fitted enclosure.

Rainbow Honey Sweet Talk Collection Packaging

Rainbow Honey Sweet Talk Collection Packaging

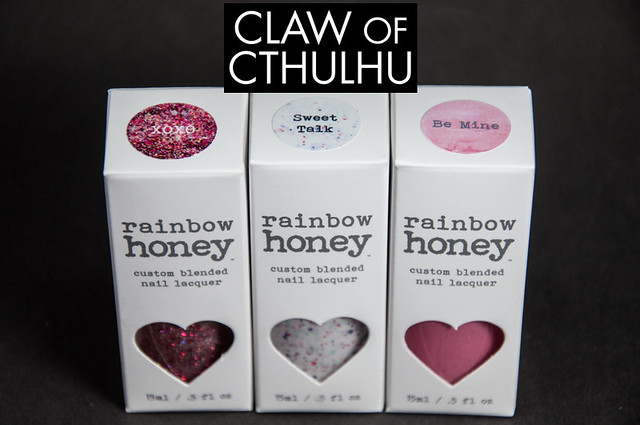
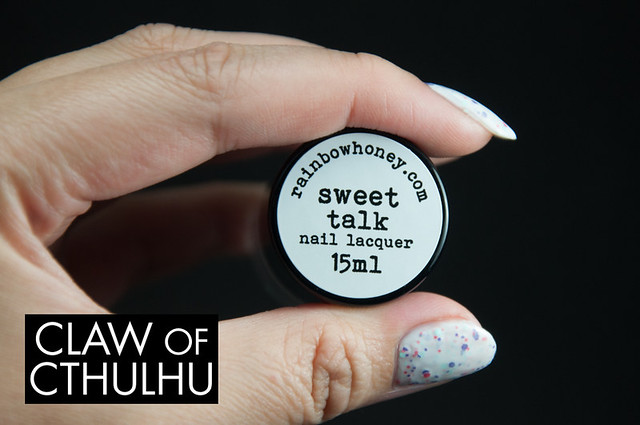
I've always liked the Rainbow Honey bottles. I have "top down" storage for my nail polish, meaning it's a giant mess in a single layer in a Rubbermaid container so I have to search for colours looking at the tops of the bottle. I think it's SO great that Rainbow Honey puts their label on top. Cult Nails and Rainbow Honey use a similar shape bottle and I'm telling you - I LOVE LABELS! Really awesome readability on these babies too. Always loved old typewriter-ish serif fonts. Yum!

Rainbow Honey Sweet Talk Collection Packaging

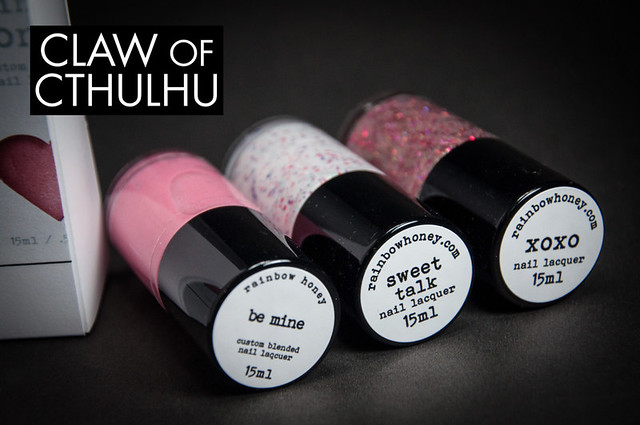
Each bottle oozes with delight. I couldn't help but take macro shots of the polish and bottles:

Rainbow Honey Be Mine Bottle And Macro

Rainbow Honey XOXO Bottle and Macro

Rainbow Honey Sweet Talk Bottle and Macro

As for swatches, I've been making individual posts with reviews but I'll try my best to recap as quickly as I can here.

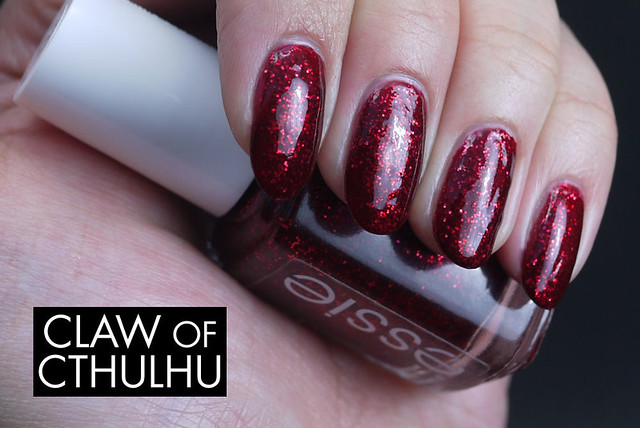
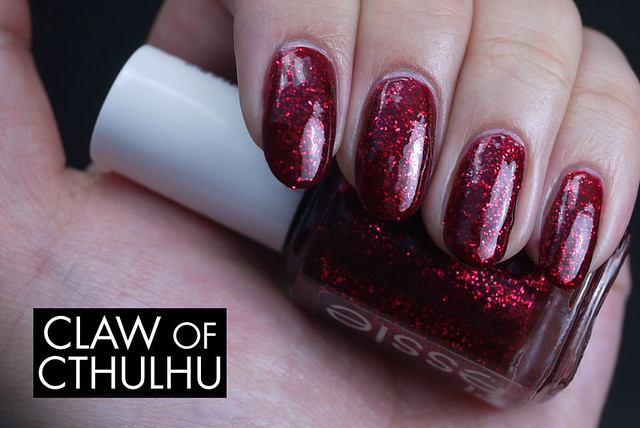
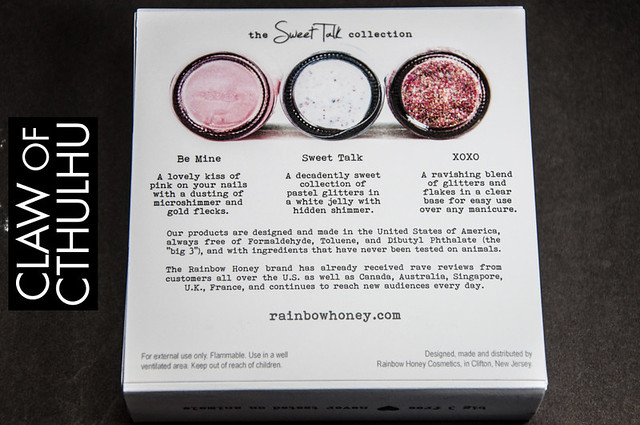
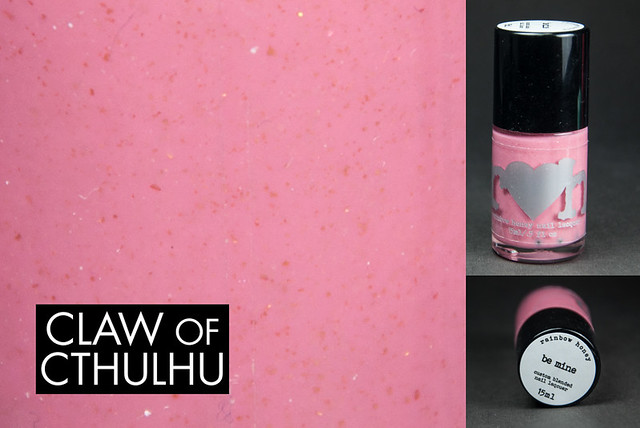
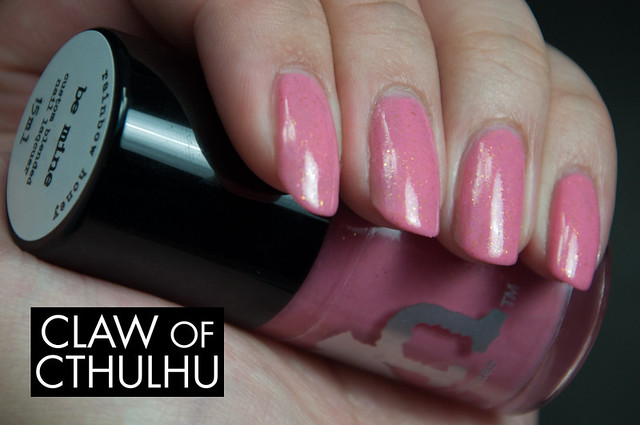
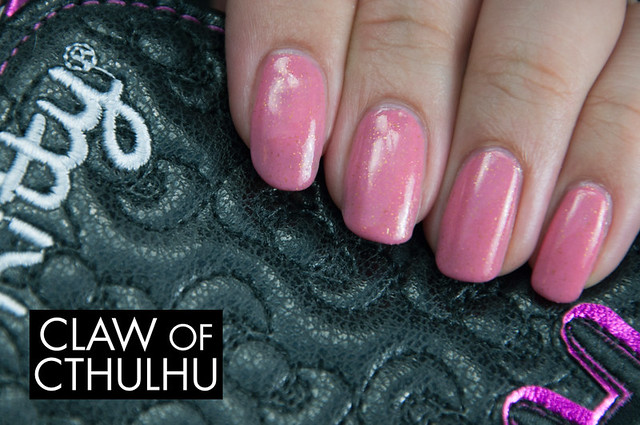
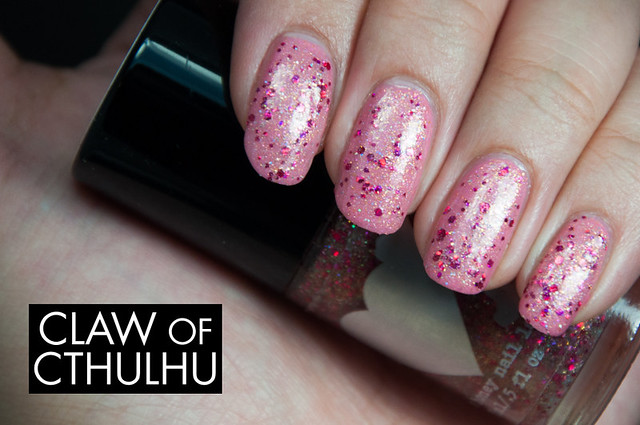
Be Mine is a creamy romantic rosy pink with gold flecks. I used 3 coats for my swatches. Formula notes: Applies very smooth but if you are the type to paint over and over one spot (like I sometimes am), you may get patchy results.

Rainbow Honey Be Mine Swatch

Rainbow Honey Be Mine Swatch

Rainbow Honey Be Mine Swatch

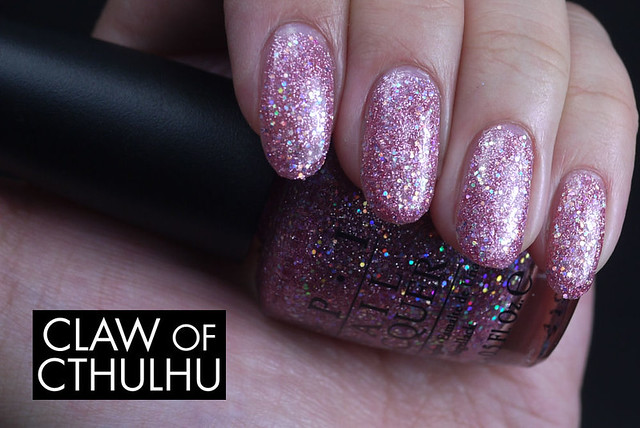
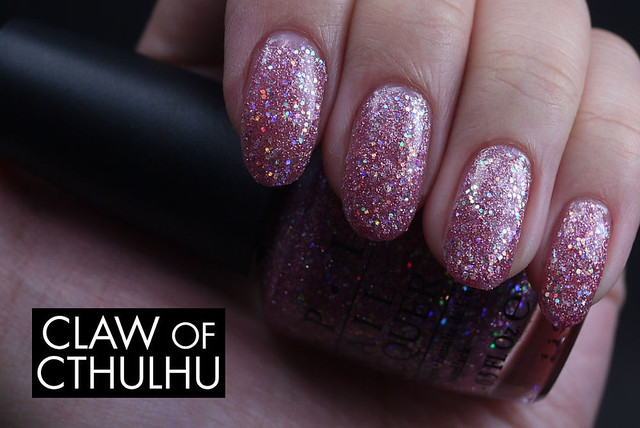
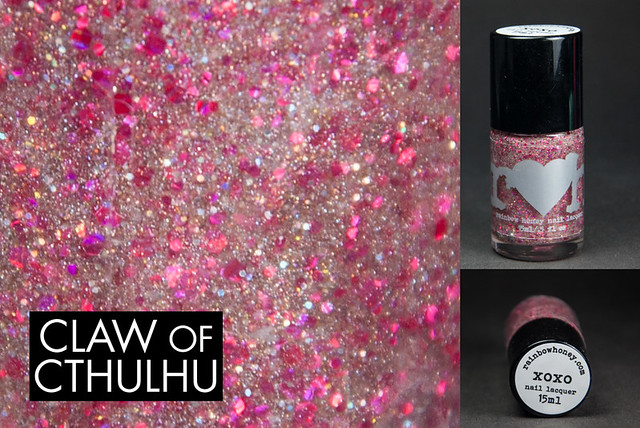
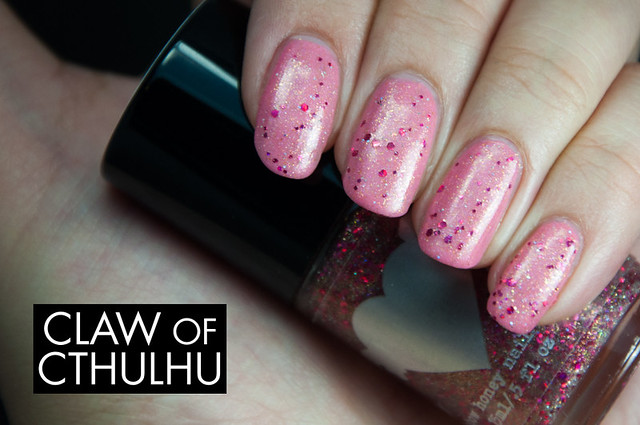
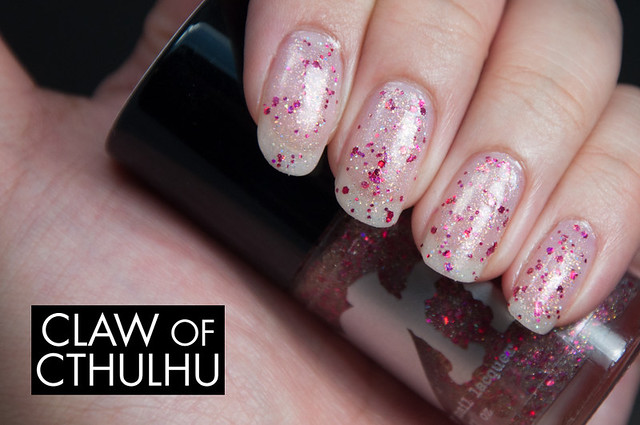
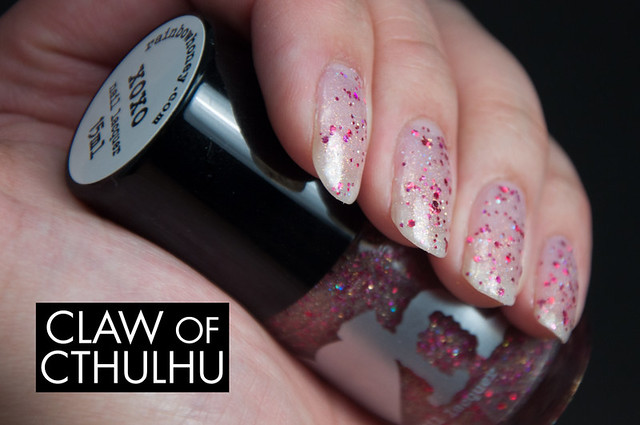
XOXO is a glitter perfect for build-up. Enriched with cheery pinks that reflect a fuchsia, with a pinch of holo glitter and infused with a prominent sea of gold flecks. Formula notes: When layering over base colours, I personally prefer one coat of XOXO as I like maintaining my base colour and letting XOXO highlight on its own. I prefer a freckled glitter look.

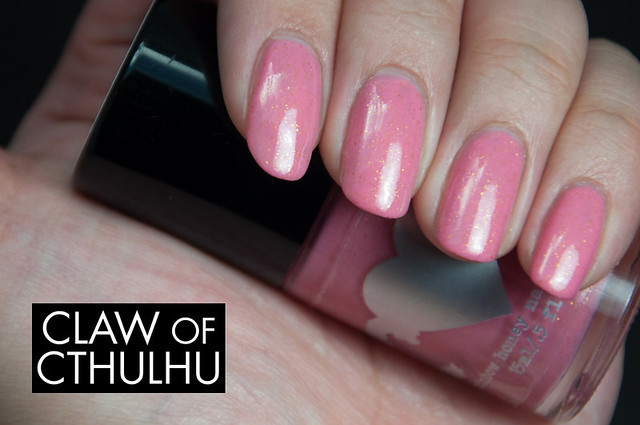
Here's one coat over Be Mine:

Rainbow Honey XOXO (over Be Mine)Swatch

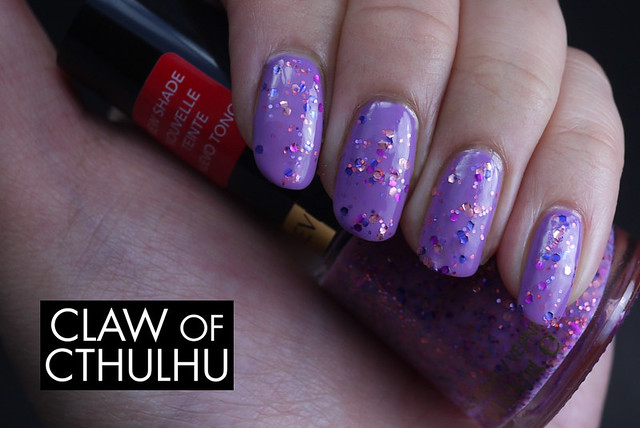
Here's one coat over OPI In The Spot-Light Pink:

Rainbow Honey XOXO Swatch

Here's what two coats of XOXO look like:

Rainbow Honey XOXO (over Be Mine) Swatch

Rainbow Honey XOXO Swatch

Rainbow Honey XOXO Swatch

Rainbow Honey XOXO Swatch

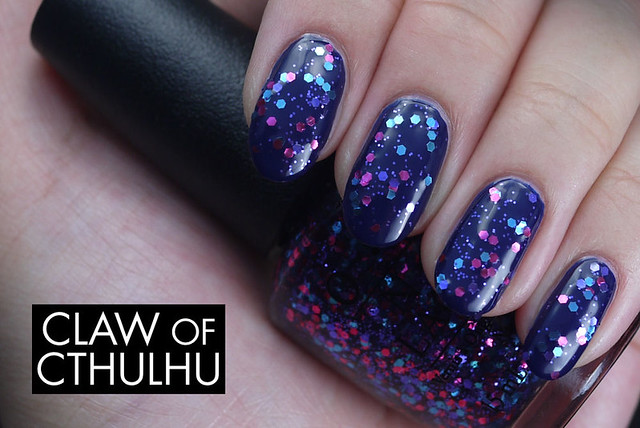
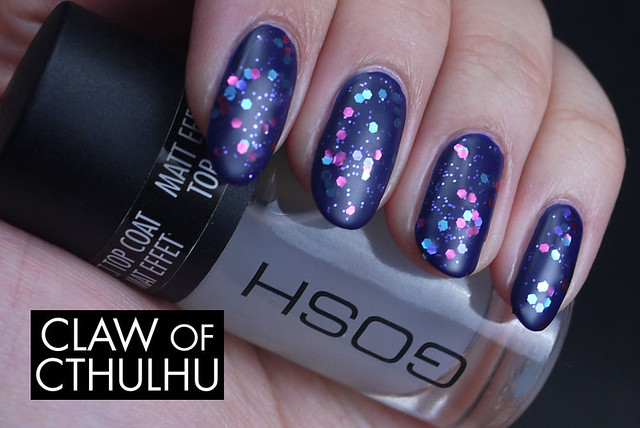
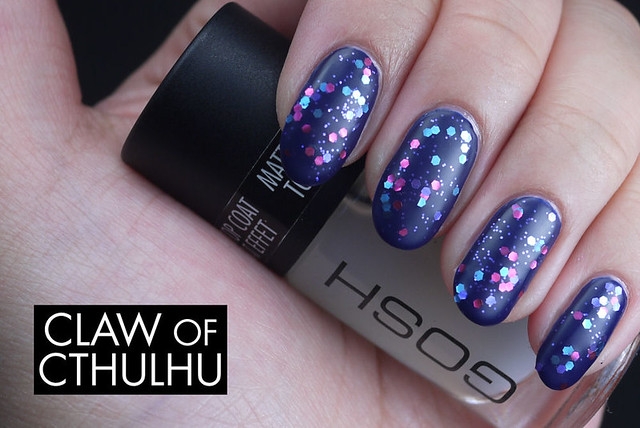
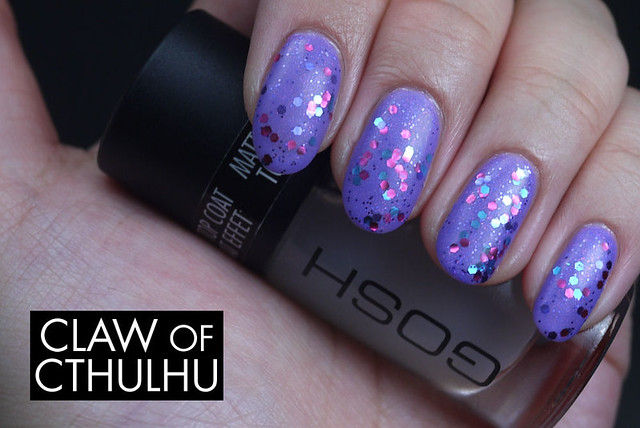
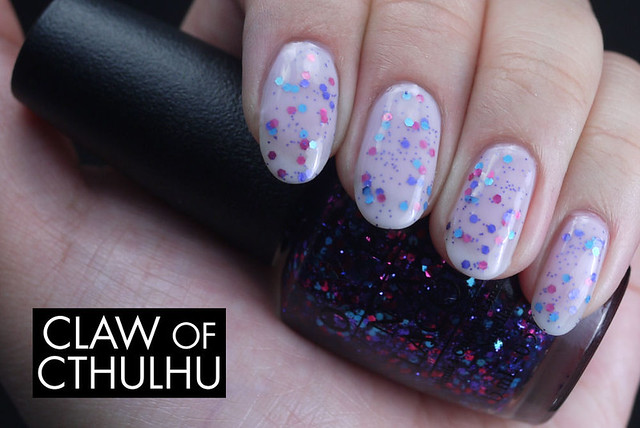
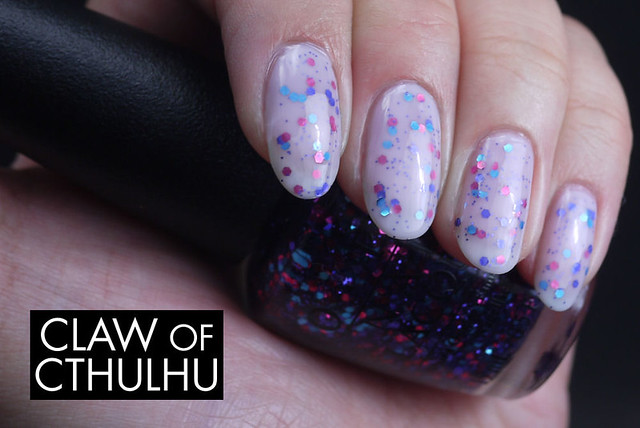
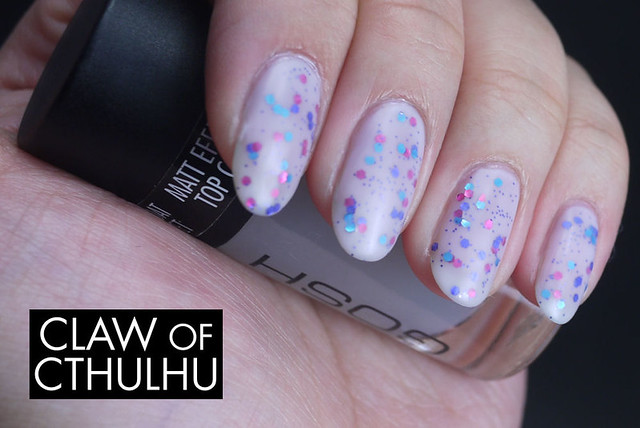
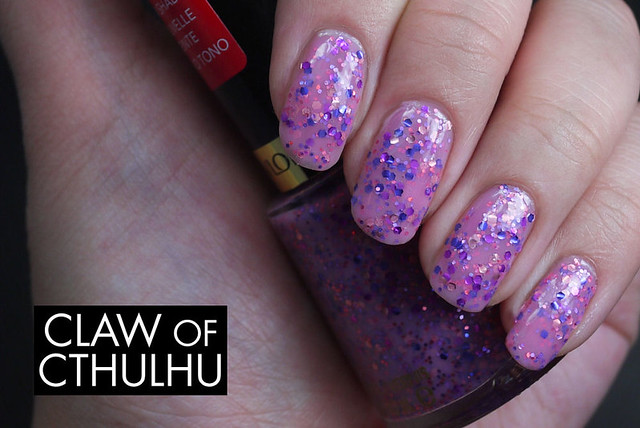
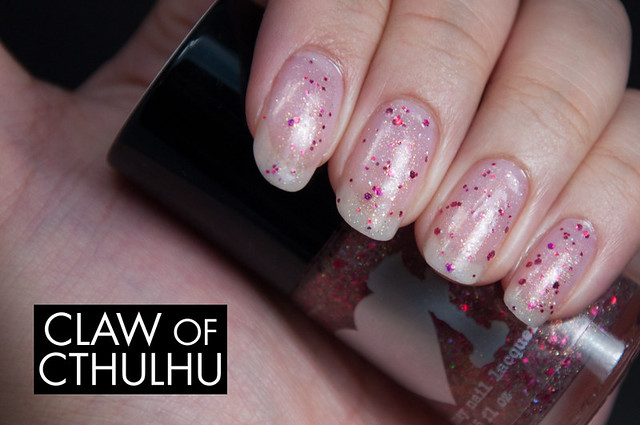
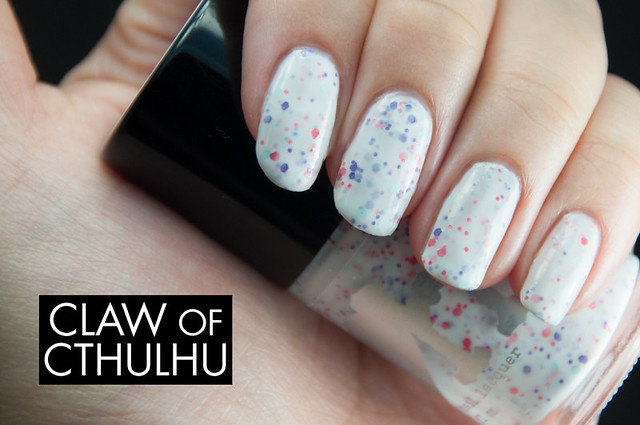
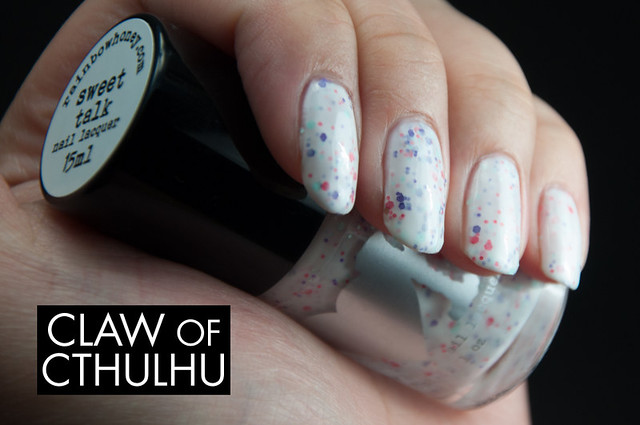
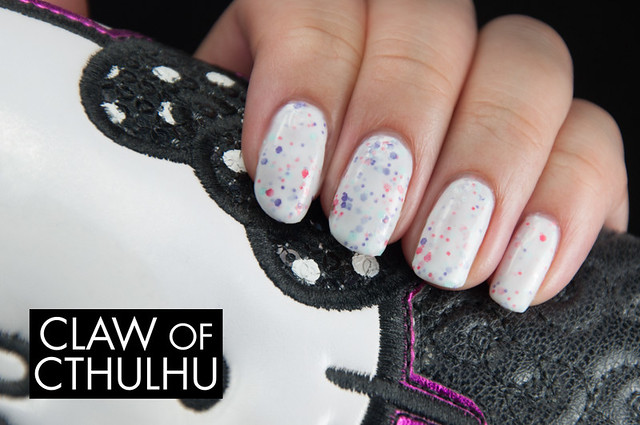
Lastly, here's the flagship of the Sweet Talk Collection - Sweet Talk! Pastel solid blue, purple and pink glitters suspended in a white jelly base. Formula notes: This may benefit from a base coat of white as when using only Sweet Talk, you need to be mindful of the white jelly build up, as well as glitters. Having a white base coat will allow you to focus on the glitter build up. Also the glitters are sticky, try to avoid getting them on the very tips as they tend to be the first to go with tip wear. Lastly, and certainly the most important - PLEASE USE TOP COAT! Make it look streamline and clean.

Rainbow Honey Sweet Talk Swatch

Rainbow Honey Sweet Talk Swatch

Rainbow Honey Sweet Talk Swatch

Rainbow Honey Sweet Talk Swatch

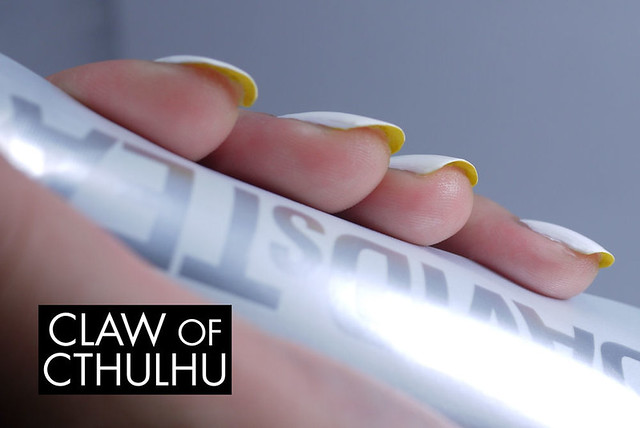
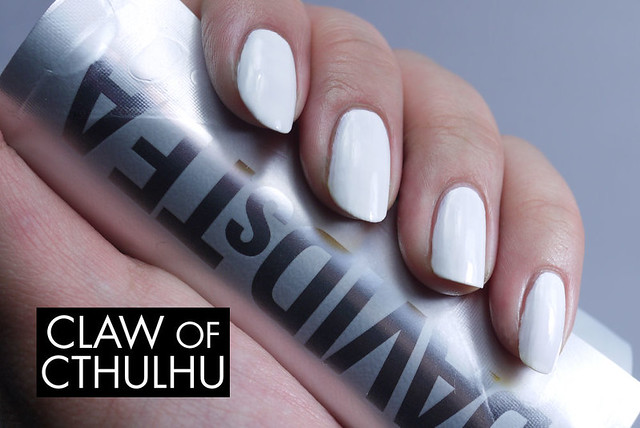
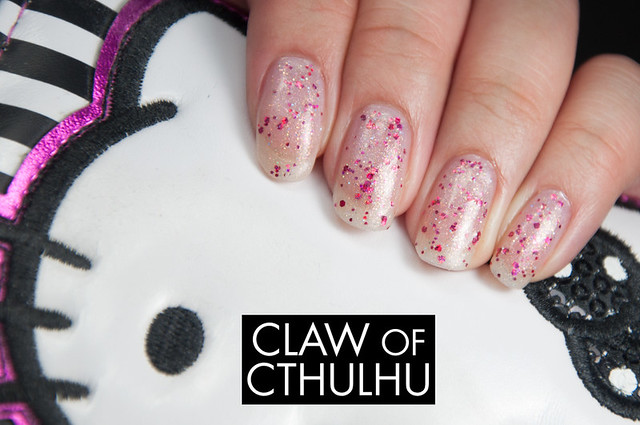
I wanted to try doing something fun with all the polishes from this collection, so I ended up trying taping. It was my first time and I had no idea what I was doing. It might have been too much, but I think with the right execution, Be Mine, XOXO and Sweet Talk all play very nice together.

Rainbow Honey Sweet Talk Collection Taping Nail Art

Rainbow Honey Sweet Talk Collection Taping Nail Art

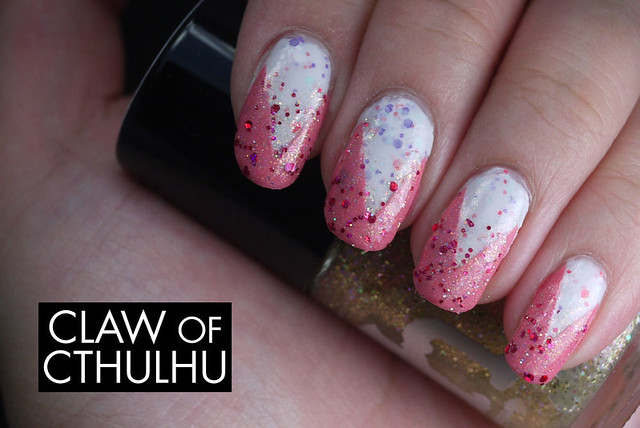
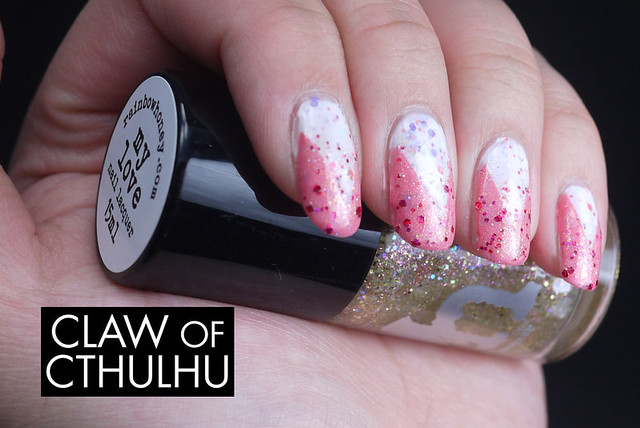
I hope you found this mega post on Rainbow Honey's Sweet Talk Collection somewhat useful. I personally love the collection and found it to be worth every dollar spent. Let me know if you have any thoughts on this collection, if you like this kind of mega post, more photos, less photos. All feedback welcome (I am still new to this nail blog thing!). Thanks guys!

Thursday 14 February 2013

Rainbow Honey Sweet Talk Swatch

Alright, let's get back on track! Here's the final member of Rainbow Honey's Sweet Talk collection - the flagship title: Sweet Talk! And my how sweet it is! This is the one that REALLY sold me. Maybe you can see why?:

Rainbow Honey Sweet Talk Bottle and Macro

Look at that solid pastel candy coloured glitter, all submerged and perfectly suspended in a white jelly. Pink, teal and purple! How lovely! The formula of Rainbow Honey Sweet Talk is relatively easy to work with. It's all on your application skills for this one. Because it's white, you need a little more of a build up and it can be a little messy because it's white. The glitter applies evenly but can be sticky. Once a glitter has chosen its place to sit, it will probably stay there. Try to avoid getting the glitters at the very tips as those are the first to go when you get tip wear. Lastly, please, please (for all that is holy!) use a top coat on this one. A top coat over a glitter/jelly polish like this is really going to make everything look streamline and clean. Anyway, enough with the banter, here's 3 coats of Rainbow Honey Sweet Talk:

Rainbow Honey Sweet Talk Swatch

Rainbow Honey Sweet Talk Swatch

Rainbow Honey Sweet Talk Swatch

I think this would really benefit by using one base coat of a white polish to get a good foundation to start with. Once you have a good foundation to work with, you can concentrate on the build up of the pastel glitters rather than the build up of the base colour. Again, I can't stress this enough but please use a top coat. I've seen swatches of this same polish without top coat and it can look crunchy and uneven.

Rainbow Honey Sweet Talk Swatch