Monday 31 March 2014

Bestie Nail Art Challenge - Week Five: Water Marble (Rainbow Honey Midnight Garden Cremes Water Marble Nail Art)

Holy. Moly. I am back from the dead. I was sick off work for an entire week last week, which was both nice and kind of crappy. It was nice because I was able to fully recover and honestly, it was a great break from social media. Made me realize some of the negative effects of Facebook! With that said, it also sucked because now I am SO behind. Behind here on Cthulhu, and just behind in work and everything in general. Ah well. Is what it is - I am still a bit sick but better enough to use a computer. So this is the FINAL week of the Bestie Nail Art Challenge with my NPBFF, Caitlin of Addicted to Lacquer. I don't know *WHY* I suggested this one, but I suggested the theme of "water marble", and Caitlin rightly put it at the end of the month. I also received my Rainbow Honey Midnight Garden collection so I tried to put two and two together and make a thing happen.

Bestie Nail Art Challenge - Week Five: Water Marble (Rainbow Honey Midnight Garden Creme Water Marble)

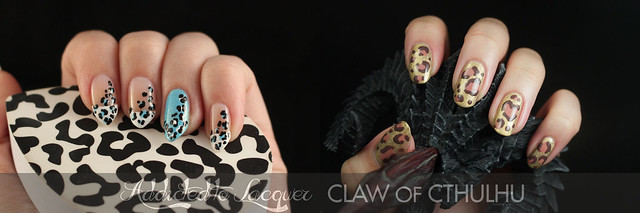
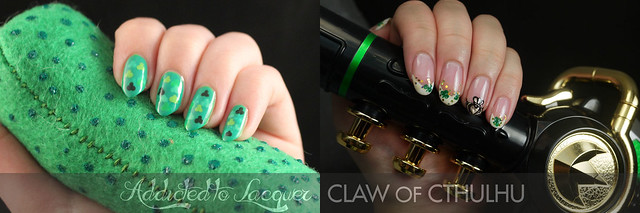
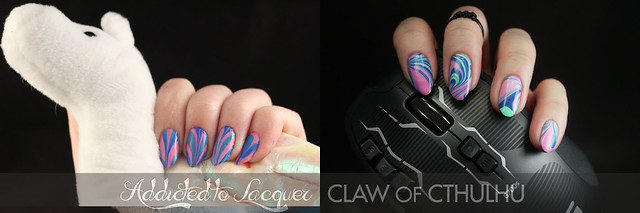
Make sure you head over to Caitlin over at Addicted to Lacquer for her water marble and general awesomeness. I can tell you right now she spent more time on her water marble as that was ONE NAIL AT A TIME. As for me, I went for a two cup operation (which actually ended up being three because I am awful but whatever):

Bestie Nail Art Challenge - Week Five: Water Marble (Rainbow Honey Midnight Garden Creme Water Marble)

Bestie Nail Art Challenge - Week Five: Water Marble (Rainbow Honey Midnight Garden Creme Water Marble)

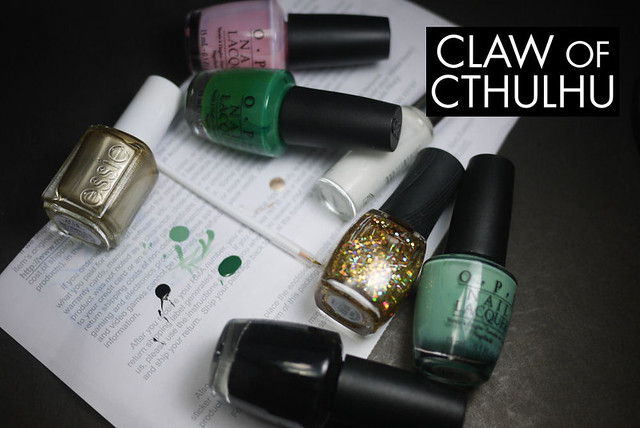
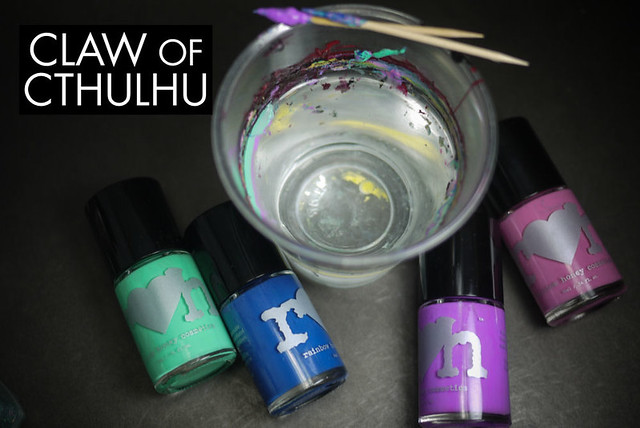
I have only water marbled a couple of times before but I had a plastic cup that I've been using for them. I used a couple of toothpicks as well. Here's a list of the materials and polishes I used for this water marble nail art:

+ 1 plastic cup
+ 2 toothpicks
+ room temperature water
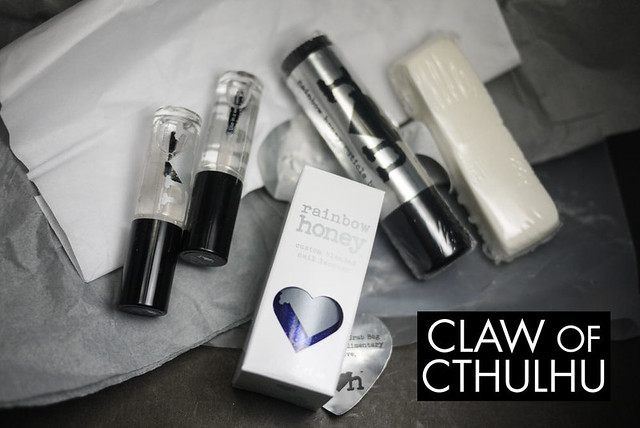
+ Rainbow Honey Charaxes (blue)
+ Rainbow Honey Cymbidium (pink)
+ Rainbow Honey Viola (purple)
+ Rainbow Tayabak (green)
+ OPI White Alpine (white base)
+ Seche Vite top coat

Bestie Nail Art Challenge - Week Five: Water Marble (Rainbow Honey Midnight Garden Creme Water Marble)

Bestie Nail Art Challenge - Week Five: Water Marble (Rainbow Honey Midnight Garden Creme Water Marble)

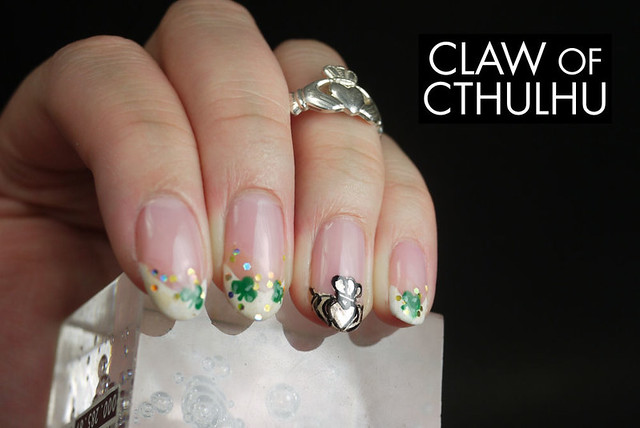
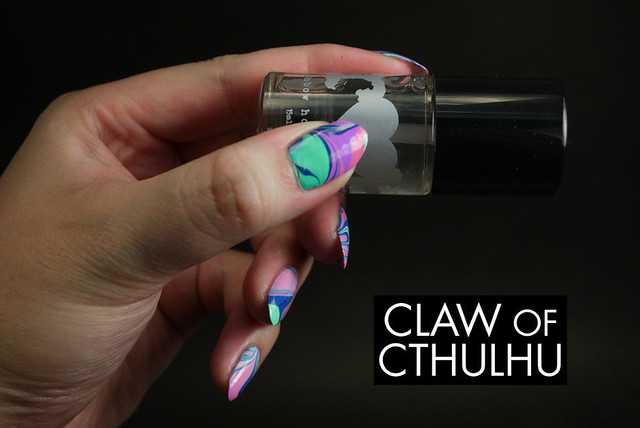
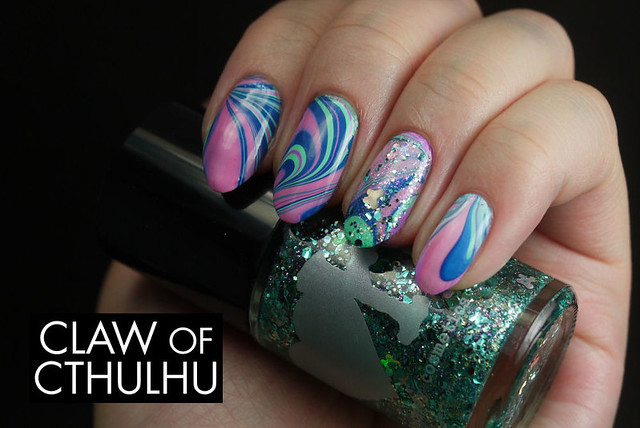
I started off with a white base - one coat of OPI White Alpine. I ended up dipping my index, middle and ring finger in one batch. I made another batch for my pinky and thumb but severely botched the pattern so just used it for my pinky rather than throwing away the whole thing, and then finally did one patch soley for my thumb. I know you're supposed to do something smart like use tape, or vaseline for your skin but I honestly had no issues with the clean up. I just made sure to use cuticle oil after so the acetone didn't dry out my hands. Here's the disaster before I cleaned it up:

Bestie Nail Art Challenge - Week Five: Water Marble (Rainbow Honey Midnight Garden Creme Water Marble)

Bestie Nail Art Challenge - Week Five: Water Marble (Rainbow Honey Midnight Garden Creme Water Marble)

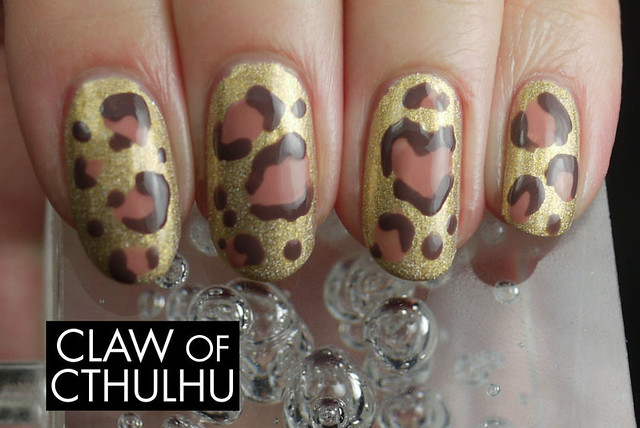
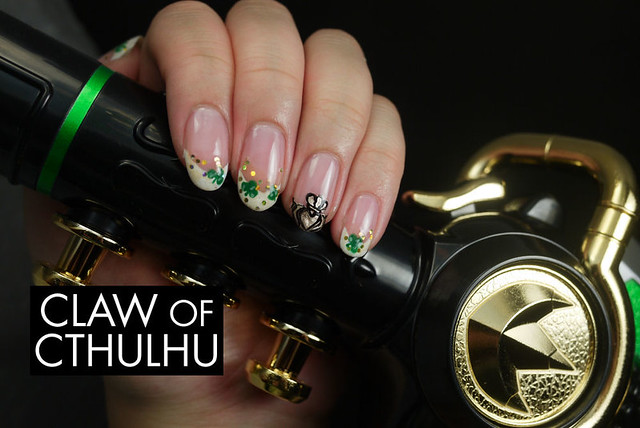
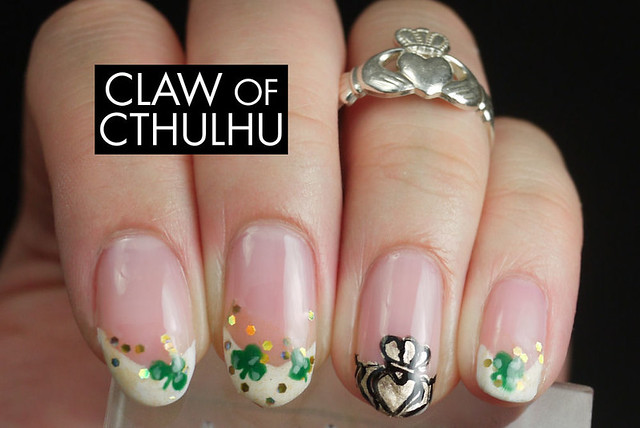
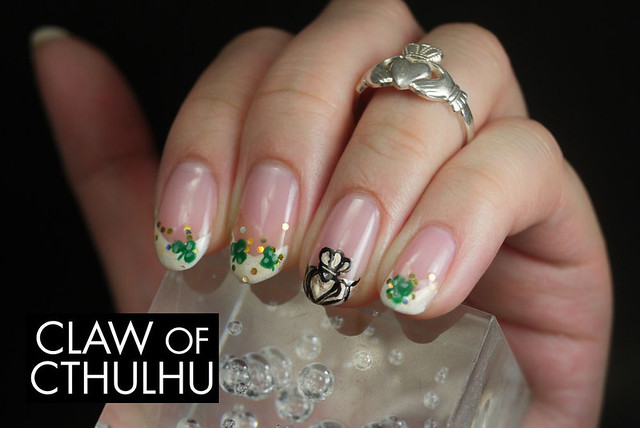
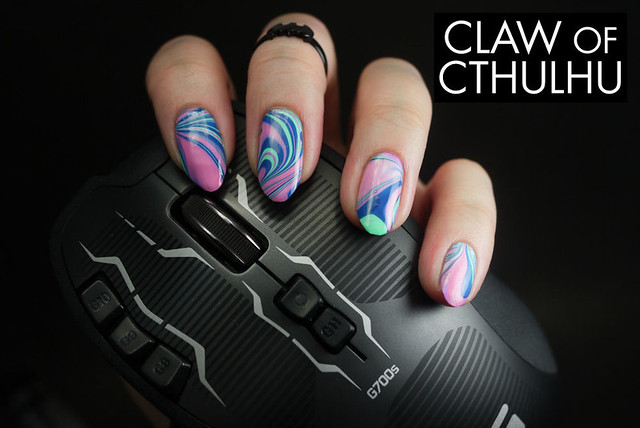
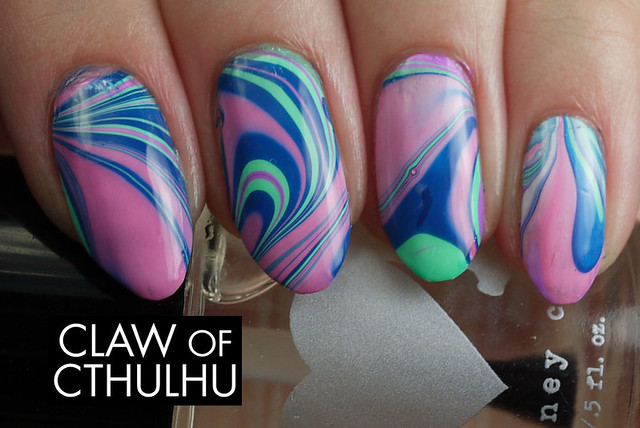
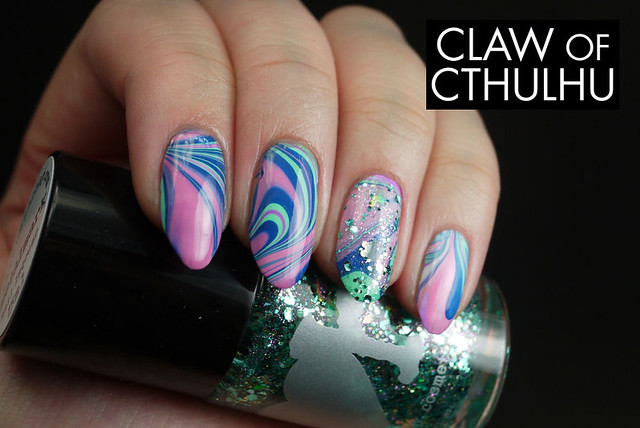
After clean-up, with Seche Vite top coat:

Bestie Nail Art Challenge - Week Five: Water Marble (Rainbow Honey Midnight Garden Creme Water Marble)

Bestie Nail Art Challenge - Week Five: Water Marble (Rainbow Honey Midnight Garden Creme Water Marble)

Bestie Nail Art Challenge - Week Five: Water Marble (Rainbow Honey Midnight Garden Creme Water Marble)

Bestie Nail Art Challenge - Week Five: Water Marble (Rainbow Honey Midnight Garden Creme Water Marble)

Bestie Nail Art Challenge - Week Five: Water Marble (Rainbow Honey Midnight Garden Creme Water Marble)

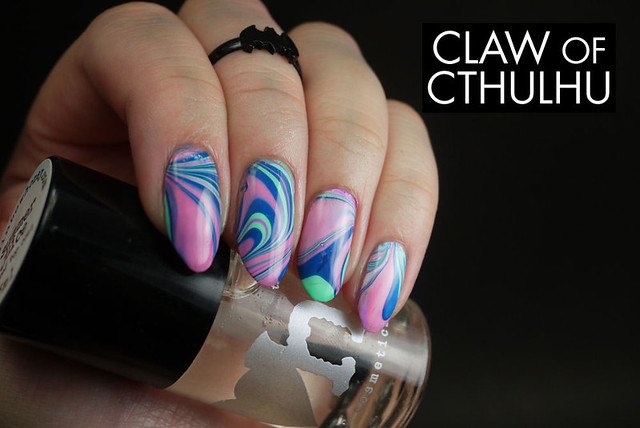
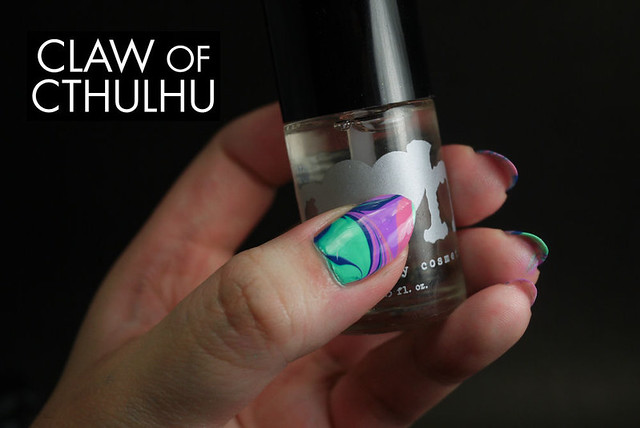
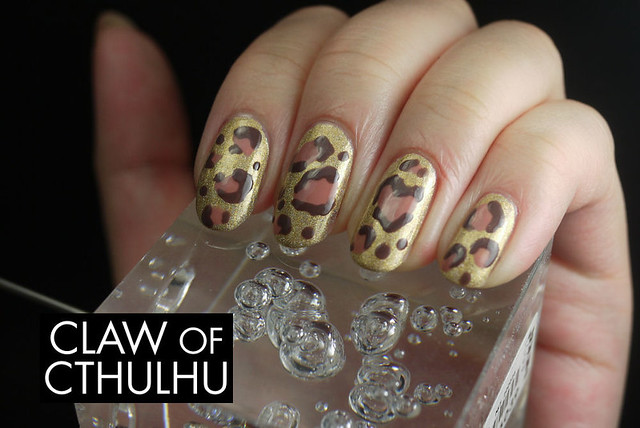
One thing that's hard to avoid when you do a water marble is the dreaded BUBBLES. Ugh. I am not sure how to avoid them but I think it's related to how you dip your hand in - maybe if I did it more slowly? More fast? I'm not too sure. I just tried my best to be careful! Unfortunately I ended up having to "patch" things up so I used a small nail brush to try and hide it. It ended up a fail because the colour is so thin so it looks different from a layer straight out of a bottle on a brush. So then I tried to cover it up with Rainbow Honey Metalmark:

Bestie Nail Art Challenge - Week Five: Water Marble (Rainbow Honey Midnight Garden Creme Water Marble)

Bestie Nail Art Challenge - Week Five: Water Marble (Rainbow Honey Midnight Garden Creme Water Marble)

Bestie Nail Art Challenge - Week Five: Water Marble (Rainbow Honey Midnight Garden Creme Water Marble)

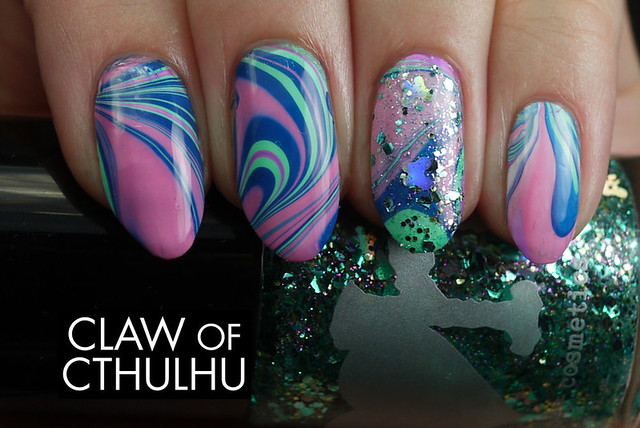
Overall, I am happy with my water marble. It's not the best and I have seen far better patterns out there, but I get so anxious over the polish drying up on the water before I dip my nail in, that I just do it as quickly as I can. It's also VERY polish heavy if you do a batch for each nail, so I also like doing two batch operations for that reason.

Anyway, that's the end of the Bestie Nail Art Challenge, I am kind of sad that it's over! I think Caitlin and I might plan to try another later this year. I also reshaped my nails. I don't know if I like them though. What nail shape do you like? Have you water marbled lately? Tell me your secrets for avoiding bubbles, I want some SCIENCE!

Monday 24 March 2014

Bestie Nail Art Challenge - Week Four: Animal Print (Classic Leopard Print Nail Art)

I am actually sick in bed today - I don't know what happened - I just got over being sick and yet I caught another bug of sorts! I noticed it when I was editing photos on Friday night and the Perrier water I was drinking was stinging me, ugh! Anyway I couldn't miss out on Caitlin's and my Bestie Nail Art Challenge: this week's theme is "animal print". I mulled over a few optionss but ultimately ended up going for a classic leopard print look.

Bestie Nail Art Challenge - Week Four: Animal Print (Leopard Print Nails with Heart Feature)

Make sure you check out Caitlin over at Addicted to Lacquer for more pics of her nails - I think she hit it out of the park this week with her french tips and colourful leopard highlights. They look AWESOME!

Bestie Nail Art Challenge - Week Four: Animal Print (Leopard Print Nails with Heart Feature)

Bestie Nail Art Challenge - Week Four: Animal Print (Leopard Print Nails with Heart Feature)

Tonight Diablo 3: Reaper of Souls drops so to celebrate, I've brought along my soulstone from my Diablo 3, Collector's Edition. Because I am a sucker for anything Blizzard puts out with the words "Collector's Edition" attached, with the exception of "World of Warcraft". But anyway, I opted for a classic leopard print look, and I went with a larger print because it was my first time and I didn't want to have any small intricate details to worry about for this time around. I started with a base colour of a shimmery slightly holographic gold with Rainbow Honey Gilded Angel, and then made 'blobs' (I am SO technical!) with Color Club Earthy Angel, and made "C" and "U" shapes with OPI You Don't Know Jacques! with a nail art brush. For funsies, I made a little heart shape leopard spot on my ring finger.

Bestie Nail Art Challenge - Week Four: Animal Print (Leopard Print Nails with Heart Feature)

Bestie Nail Art Challenge - Week Four: Animal Print (Leopard Print Nails with Heart Feature)

Bestie Nail Art Challenge - Week Four: Animal Print (Leopard Print Nails with Heart Feature)

Anyway I'll leave there as I need to get back to bed and rest but I hope you enjoyed this. Have you done leopard print nails before? What colours would you use for a funkier look? Any fellow nail bloggers getting in on Reaper of Souls? I'm currently a level 171 paragon wizard looking forward to level 70 and getting new gear.

Friday 21 March 2014

Julep Irish Flag (Teri, Nicolette, Payton) Gradient and Irish Cupcake Nail Art (Happy Birthday @primadonnadiamond on Instagram!)

Firstly, I want to start off this post with a positive one - I know I came off a little down/weird in yesterday's post but I just want to say, without a doubt discovering and taking part in the nail art community has been one of the best things that has come into my life in the last few years. I've met so many awesome folks, from all walks of life and sharing with each other our ideas, talents, and life events - it's very special and it comes to show you that you're never alone and everyone is different. So, thank you. I'm happy to have met all of you.

With that said, I've got a special shout out today on my blog - I'm wishing @primadonnadiamond on Instagram a very lovely birthday - she has amazing swatches, her art is always clean and she was there to greet me and tell me that she missed me when I was forced to take a hiatus on Claw of Cthulhu. Such good people! Seriously one of my favourite girls on Instagram. You can check out her work here.

Now my work isn't the cleanest but our friend @catsnails wanted to put together a little surprise for her birthday - a few of our takes on cupcake nail art! Without any further adieu, here's mine, and I'll explain a little more after the photos:

Julep Irish Flag (Teri, Nicolette, Payton) Cupcake Nail Art

Julep Irish Flag (Teri, Nicolette, Payton) Cupcake Nail Art

Julep Irish Flag (Teri, Nicolette, Payton) Cupcake Nail Art

Alright, now the explanation for "Irish Cupcakes"!

I recently made my first order on Julep for the "Party's Over" Glitter Nail Polish Removal Kit (review will be up next week) but they also happened to have a big sale on Saint Patrick's Day themed nail polish combos! So I picked up Julep "Irish Flag" hoping they'd show up on time for Paddy's Day but alas! They came a few days after! Oh well, I figure I'll jump on the boat nonetheless as it's still close and in the same week, right?

Julep Irish Flag (Teri, Nicolette, Payton) Cupcake Nail Art

Julep Irish Flag (Teri, Nicolette, Payton) Cupcake Nail Art

Julep Irish Flag (Teri, Nicolette, Payton) Cupcake Nail Art

Irish Flag includes Teri (orange coral creme), Nicolette (white creme) and Payton (kelly green creme). The formula for all of these colours was incredibly thick. I think that these are all meant to be one coaters but I ended up using two coats for my single nail swatches. I also did an Irish flag gradient to see if it really lives up to its name!

Julep Irish Flag (Teri, Nicolette, Payton) Cupcake Nail Art

Julep Irish Flag (Teri, Nicolette, Payton) Cupcake Nail Art

I think it's close enough! The only one that is a bit off would be Teri, I think it is a little too pink in the coral hue and could have been more orange - but would anyone really notice it in passing? I don't think so.

What's have you done in your life in the last few years that has brought you happiness? What do you think of these Julep polishes? Are most of them meant to be one coaters?

Thursday 20 March 2014

Deborah Lippmann Today Was A Fairytale Swatch and Review

So here's a funny story: I was out shopping, scrolling through my Facebook feed on my iPhone last night and then I see one of my exes got engaged. I also happened to be in the "Self-Help" section in Chapters. Oh, my life is HILARIOUS! Anyway, with that said, I think I needed to TREAT MYSELF... So, I got The Nerdist Way by Chris Hardwick, a new Moleskine sketchbook, a cheap polish for Cheap Polish Tuesday, and Frozen on Blu-Ray and DVD to watch with my parents on the weekend. In addition to that, I am wearing some MOTHER FUCKING DIAMONDS ON MY NAILS!

... Well sort of.

This is Deborahh Lipppmann's Today Was a Fairytale, a glitterbomb comprised of cold hued silver glitter and hex glitters. It also contains... VIRGIN DIAMOND POWDER!... Which apparently is an abrasive made of diamonds and used for polishing. Not really sure if it's actually a good thing to have in a nail polish but it's just something cool to say: "Yep, my nails have f*cking diamonds on them. That's RIGHT." Anyway, formula wise this one was great - completely flexible. You could use one coat for a glitter topper, or you can be crazy like me and use three coats to build it up to the bomb of glitter it can be. I used two coats of Seche Vite for this a la Chantal style (that girl is the queen of top coat!):

Deborah Lippmann Today Was a Fairytale Swatch

Deborah Lippmann Today Was a Fairytale Swatch

Deborah Lippmann Today Was a Fairytale Swatch

Deborah Lippmann Today Was a Fairytale Swatch

Deborah Lippmann Today Was a Fairytale Swatch

Deborah Lippmann Today Was a Fairytale Swatch

Deborah Lippmann Today Was a Fairytale Swatch

I love this polish, albeit it's not that special. It was one of my unicorns that I looked at whenever I shopped on Nail Polish Canada and finally after a year or so of waiting, it went on sale. I'm sure any other silver glitter could dupe this but having "the lulz" of saying that you have diamonds on your nails is too good to pass up, especially if you are being silly like me. Another reason why I am wearing this polish is I finally got my Julep 'Party's Over' Glitter Nail Polish Removal Kit, so I'll be trying that out this weekend. Hopefully it lives up to the hype. I'll be posting my review next week.

Anyway, what do you think about this polish? Would you wear DIAMONDS on your nails? What would you do if you saw one of your exes get engaged on Facebook, would you treat yourself? If not, well, tell me what you do to TREAT YO SELF!

Monday 17 March 2014

Bestie Nail Art Challenge - Week Three: St. Patrick's Day (Shamrock French Tips and Claddagh Nail Art)

Do you ever do that thing where you have an idea in your head and then things go horribly wrong? I guess that's what happened this week for the Bestie Nail Art Challenge with Caitlin from Addicted to Lacquer. This week's theme is (obviously) St. Patrick's Day. I wanted to go for something clean (originally), some gold glitter over some french tips and then some shamrocks. Sounds OK so far... Then I thought about adding a Claddagh highlight nail tip. Yeah. That's when things went wrong...

Bestie Nail Art Challenge - Week Three: St. Patrick's Day

Be sure to check our Caitlin's side of things over here. Apparently she wasn't too happy with her shamrock pond nails either but I guess that's why we're besties - always in sync, haha!

Anyway, here's how my St. Paddy's nail art ended up:

Bestie Nail Art Challenge - Week Three: St. Patrick's Day

Bestie Nail Art Challenge - Week Three: St. Patrick's Day

All the nail art was freehanded and I think I know where the problem stems from... All the nail art was freehanded... Haha! I wasn't too happy with how my Claddagh highlight nail looked but in all honesty it just took way to long to do, so I couldn't remove it. And it's not that it was complete shite, it's just that it was painted horribly crooked.

Bestie Nail Art Challenge - Week Three: St. Patrick's Day

Here's a full list of all the supplies that I used for this nail art:

- fine nail art brush
- white polish striper
- OPI In the Spot-Light Pink (sheer base)
- Quo by Orly Cheers to You (holo gold hex and bar glitter)
- OPI Jade is the New Black (for the green shamrocks)
- OPI Mermaid's Tears (for highlights on the shamrocks)
- Essie As Gold as it Gets (claddagh tip)
- OPI Black Onyx (claddagh black outline)

And for some reason I keep bringing one tool from last challenge into the next so that was the fine nail art brush this time around! So here's how I made these nails - I started with a sheer foundation with two coats of OPI In the Spot-Light Pink. Then on all the nails but the ring nail, I freehanded a white french tip with a white striper. So far, so good... but here's when things started going south. I wanted to add a touch of gold glitter so I pulled out Quo by Orly's Cheers to You from maybe two years ago and I noticed there were little gold flecks that were in the base. That wasn't there before. It looks like over time, the base had eaten away at the glitter and now even has a yellow tinge to it. A bit of a bother! To make matters worse, I started outlining the Claddagh highlight tip with Essie As Gold As It Gets but the formula dries SO fast and is SO thick that it caused huge problems and turned out a bit lumpy. I started on the shamrocks with OPI Jade is the New Black, which were just fine. They were relatively easy to do as long as I had some patience and remembered to stay small. Added some highlights with OPI Mermaid's Tears - still OK. Then I started outlining the Claddagh and I was semi OK with it. I mean, it looked OK for what it was - I am still a complete n00b at nail art... But then I realize I painted it completely crooked and it was already sticking out like a sore thumb with the 'heavy' black outline. UGH. Anyway, topped it off with Seche Vite top coat and called it a night:

Bestie Nail Art Challenge - Week Three: St. Patrick's Day

Bestie Nail Art Challenge - Week Three: St. Patrick's Day

Bestie Nail Art Challenge - Week Three: St. Patrick's Day

I thought about redoing them because the way everyone celebrates St. Patrick's Day in Vancouver is more like St. FRATrick's (har har get it?) so I thought about doing SUPER TACKY St. Paddy's nails instead but maybe I'll chalk it up for next year.

Have you ever had a fail nail art? What went wrong? What are you doing for St. Patrick's; is it something you observe?

Thursday 13 March 2014

Rainbow Honey December Large Grab Bag: Unboxing!

It might be a liiiiiittle late but I've got another Unboxing Post for y'all. It's the Rainbow Honey Large Grab Bag when they first rolled out mystery bags or grab bags last year in December. I figured I'd leave it up on the Interwebs for the sake of history! (And because I somehow broke my pinky nail so I've been rather uninspired to swatch, booooo. ALL THE NAIL ENVY!) But anyway, in December, Rainbow Honey introduced the concept of "grab bags" that were complimentary when you made an order on their site. They came in three sizes: Small, Medium and Large. I obviously inflated my order so I could get a Large one. Yup, that's me.

Rainbow Honey December Large Grab Bag Unboxing

It came in a simple durable plastic bag that was sealed by a cute silver heart sticker. Inside were the items in wrapped tissue paper. Here's what came with the Large Grab Bag!:

Rainbow Honey December Large Grab Bag Unboxing

I got two top coat minis. One was the Summer Juice scented top coat and the other was Magic Cake scented (would be released two months after).

Rainbow Honey December Large Grab Bag Unboxing

Rainbow Honey December Large Grab Bag Unboxing

I also got some make-up sponges. I thought it was kind of random to be honest, but seeing that I don't actually have make-up sponges, I actually really appreciated them.

Rainbow Honey December Large Grab Bag Unboxing

And for my favourite item in the Grab Bag - I got a large cuticle stick! I got it in the Sakura Matsuri scent which is my favourite (as well as my first cuticle stick scent so it was kind of sentimental!).

Rainbow Honey December Large Grab Bag Unboxing

Rainbow Honey December Large Grab Bag Unboxing

And for funsies (always for funsies), check out how the large cuticle stick (0.5 oz) sizes up compared to the original size cuticle stick (0.07 oz)! SUBSTANTIAL. Wow.

Rainbow Honey December Large Grab Bag Unboxing

Rainbow Honey December Large Grab Bag Unboxing

And lastly, the main event - a full sized polish! This one was simply called "Sample" but once I posted my swatch of it on Instagram, I was told that others had received a mini of it and it is called "Midnight Fountain". But that is yet to be official! The Midnight Garden Collection comes out in a bout a week's time so we'll see how accurate that is!

Rainbow Honey December Large Grab Bag Unboxing

Rainbow Honey December Large Grab Bag Unboxing

Rainbow Honey December Large Grab Bag Unboxing

Rainbow Honey December Large Grab Bag Unboxing

Now that Rainbow Honey has posted all the polishes on their Facebook, I still don't see this one! Hmmm.

Anyway I just wanted to put this on the Internet for the good old archive sake. I saw some photos of what their March mystery bag looks like and it's coming along with a custom large sticker! (Hopefully I'll get my claws on one soon!) What do you make of the mystery bags Rainbow Honey is coming out with? Can you see a substantial difference between this one and their latest and greatest? I for one wished there was a subscription option!