Thursday, 28 March 2013

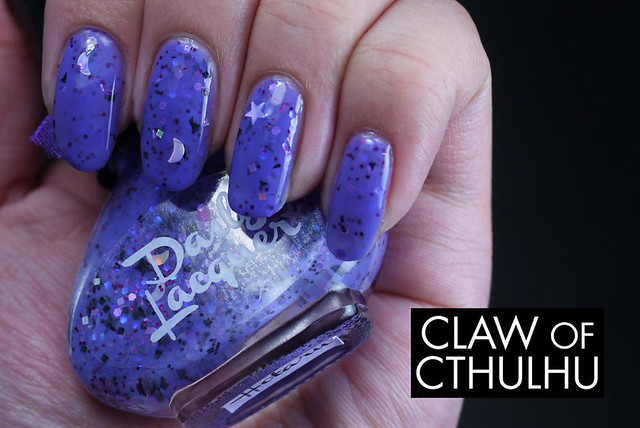
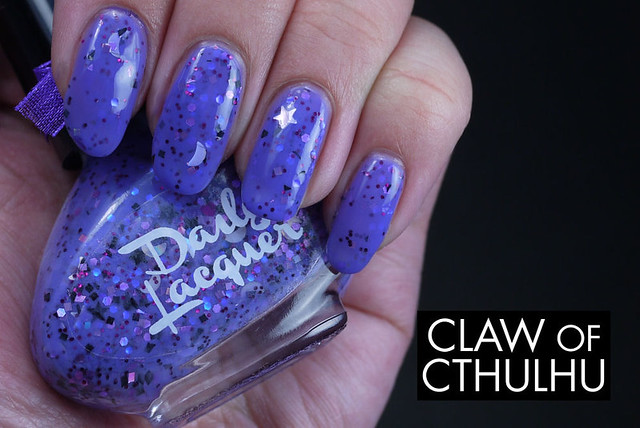
Daily Lacquer Hotaru Swatch

The long weekend is here which means I will be away on Good Friday as well as Easter Monday so I'd figure I'd leave one of my fave new polishes lingering up on the blog for the holiday! Today I have an indie polish from Daily Lacquer, which is run by Maggie of the Daily Lacquerista in Seattle. (West coast is the best coast, what what!) Anyway, I was introduced to Daily Lacquer from Rainbow Honey via Twitter. I had tweeted to Dee begging for a Sailor Moon collection to be made. While she lamented over wanting to make ALL THE COLLECTIONS! she explained that it wasn't possible and another indie polish maker had already had them in production - enter Daily Lacquer.

It took me a while to get through No Buy February but I bit the bullet a couple of weeks ago and placed an order. Unfortunately I was too late and missed out on the Inner Senshi Collection but I managed to snag Hotaru from the Outer Senshi Collection. Hotaru is based on Sailor Saturn, who was one of my favourite sailor scouts in regards to aesthetic. Daily Lacquer Hotaru itself is a sheer pastel violet jelly base with some definite blue-biased tones, packed with a ton of glitter - I'm talking silver moons, silver stars, purple hearts, black glitter, black shreded irregular shaped glitter, and some slightly blue-pink iridescent larger hex and squares. Daily Lacquer bottles are super cute. The shape of the bottle is very unique, and the bow detailing is adorable. I wondered if it would slip off but it was very sturdy. Maybe they're glued into place? In either case, I didn't want to risk ruining it.
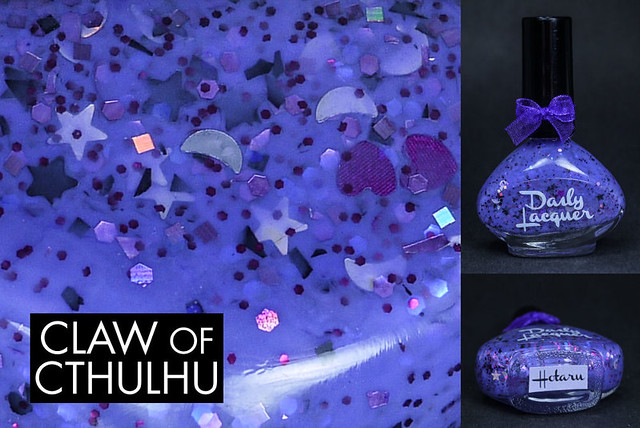
Daily Lacquer Hotaru Bottle and Macro

It does take a few coats to build up Hotaru on her own, but the result is very cute and fun with a lot of added depth from the glitter in each layer. Like most polishes with large shaped glitter, you must fish out the moon, star and heart glitter. (I don't think I even got to manage getting a heart glitter! Ah well.) I turn the bottle upside down, give it a bit of a shake and fish away! I did this for my final coat. The formula is very fast drying so multiple thin layers are OK when wearing Hotaru alone. I used Seche Vite top coat on my swatches. Generally I recommended using a thick top coat like Seche Vite when wearing a heavy glitter polish like this because it smooths everything out. Top coatless glitter polishes can tend to look clumpy, unflattering and the glitter may snag on things like hair, stockings, etc.
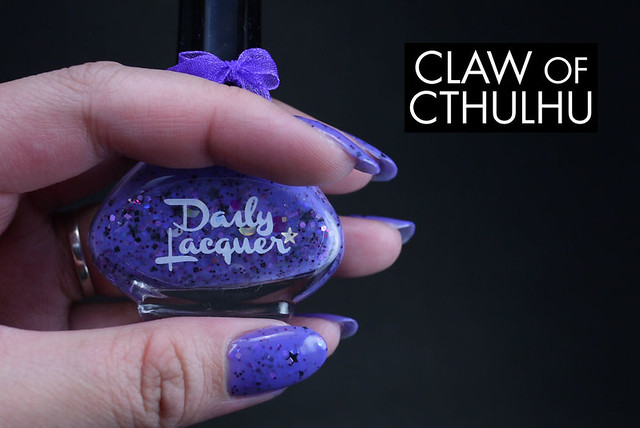
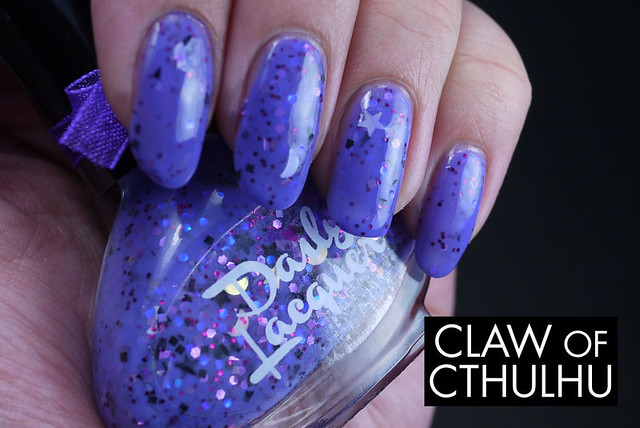
Daily Lacquer Hotaru Swatch

Daily Lacquer Hotaru Swatch

Daily Lacquer Hotaru Swatch

Daily Lacquer Hotaru Swatch

Sorry for the awkward bottle holding. It was hard to grip, haha! #nailbloggerproblems

I've been loving matte top coats over glitter lately so obviously I had to do it with Hotaru. I used American Apparel Matte Top Coat for these swatches.
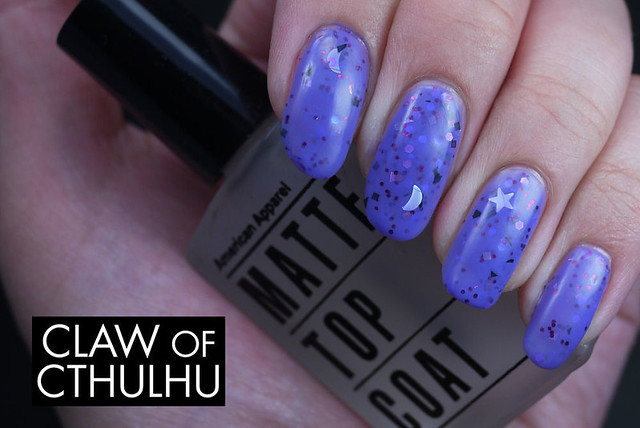
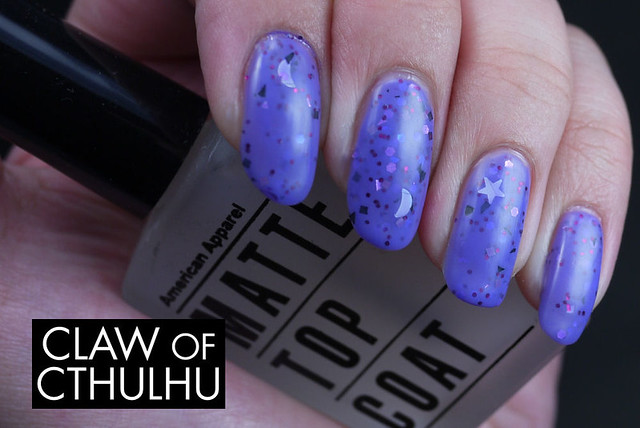
Daily Lacquer Hotaru Swatch

Daily Lacquer Hotaru Swatch

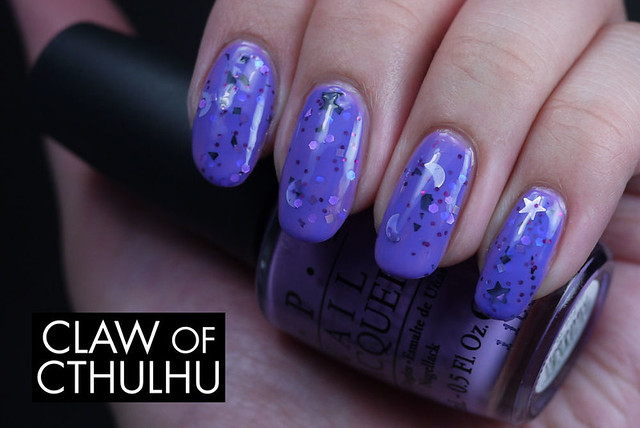
Finally, I wanted to see how Hotaru would work with a base colour seeing that the base jelly was so, so sheer on the nail. I applied two coats of OPI Planks A Lot and used my fishing technique to ensure that I would have some of the fun glitter on. I was very surprised to see that the violet blue tone essence of the Hotaru base jelly completely overwhelmed Planks A Lot. You can see a few streaks in my swatch that reveals the warmer Planks A Lot tones but overall, one coat of Hotaru completely changed the colour underneath. Again, I used Seche Vite for top coat.
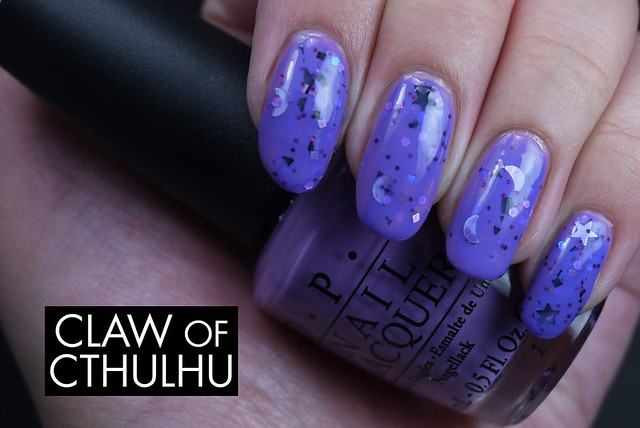
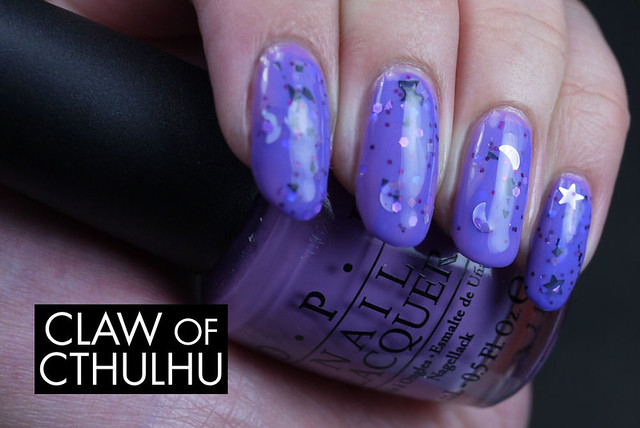
Daily Lacquer Hotaru Swatch (over OPI Planks A Lot)

Daily Lacquer Hotaru Swatch (over OPI Planks A Lot)

Daily Lacquer Hotaru Swatch (over OPI Planks A Lot)

And just for funsies, here's my Crescent Moon Wand from Kuma Crafts, another Canadian based indie jewelry maker! INDIE LOVE ALL AROUND.
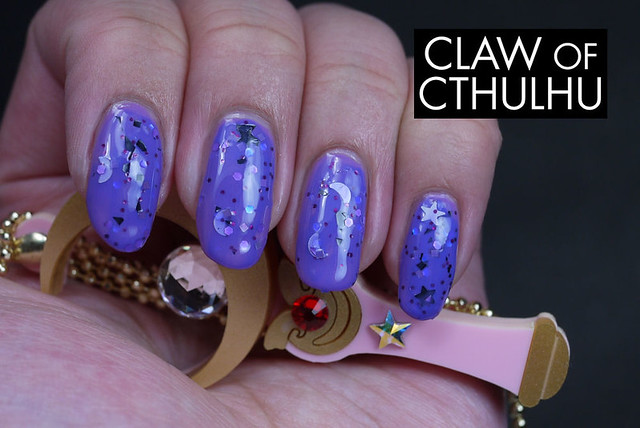
Daily Lacquer Hotaru Swatch (over OPI Planks A Lot)

Overall, my first experience with Daily Lacquer was great. Mag loves communicating with fans and fellow polish addicts alike. She's very approachable, very open with updates in her schedule and processes of new collections.

That's all for now and I'll be back on Tuesday! Have a happy Easter everyone!

Wednesday, 27 March 2013

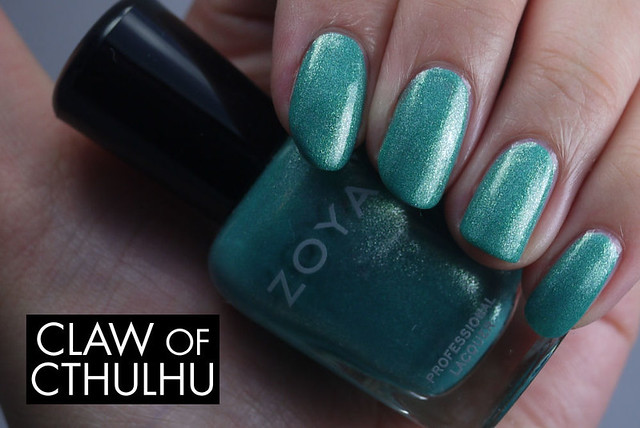
Zoya Zuza Swatch

This morning I ate so many tacos and spent too much money on photography gear. I am officially on a "Low Buy April (and May)" starting now. I have a ton of unswatched polishes and need to catch up on some nail art ideas so doing a "Low Buy" should be doable. I say "Low Buy" because the "No Buy" killed me and I ended up going on a serious unnecessary binge at the end of "No Buy February". Also Rainbow Honey is coming out with a new collection and I am a completionist with RH.

So here's another from the back log. I don't know why I held off on it for so long because Zoya Zuza is one of my favourite polishes ever. It was release in 2012 in the Zoya Surf collection. Zuza sits in the aqua turquoise teal family that I incredibly love so, so, so much. The formula was OK but it does that thing where it is quick drying and you might want to give it time to set or you will be patching it (as I did here). I would suggest three thin coats, leaving a little bit to dry between each layer. The results is a perfect teal metallic, almost foil finish with slight green biased shimmer a plenty.

Zoya Zuza

I caught up on editing some of my latest swatches so I'll be posting a newer one tomorrow! I am excited. I am totally done with my back log of white background photos, yuck, haha.

Tuesday, 26 March 2013

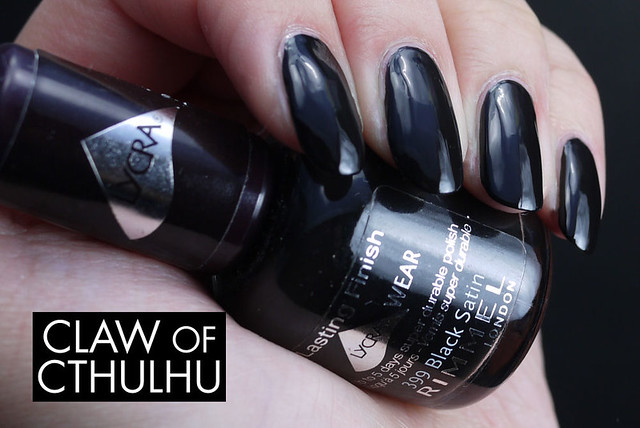
Rimmel Black Satin Swatch

Welcome to Cheap Polish Tuesday where we explore polish that can be found whether on sale or not for $5 or less! Today I've got one of my favourite polishes (surprisingly) - Rimmel Black Satin! Now before I move on - I know this might seem boring but believe it or not, I used to wear exclusively black nail polish. That's all. Black or bust. I've had this polish for maybe 5 years so my review may be skewed because of the age but in spite of this one, I hope it's a good sign that it's lasted so long with me! Here we go:
Rimmel Black Satin is a high gloss black that is a near one coater! Yeah, you'd better believe it. Never mind my Cult Nails Nevermore - or even my Deborah Lippmann Edge of Glory base, this one goes on in one thick coat and a couple of strokes for patch ups. The finish is gorgeous. It doesn't even need a top coat to shine. I used Black Satin for my black Victorian rose Doc Martens nail art and the staying power was over a week.
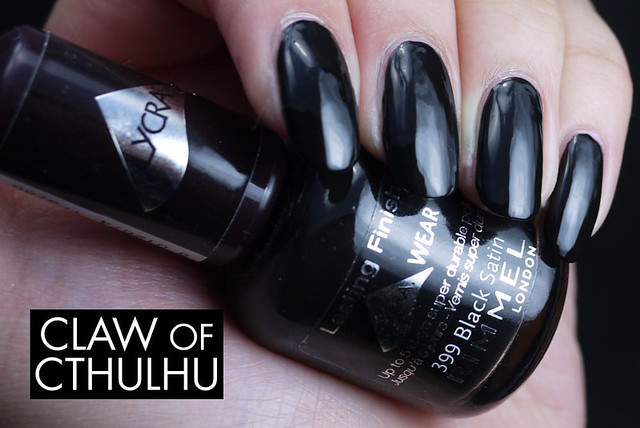
Rimmel Black Satin Swatch

Rimmel Black Satin Swatch

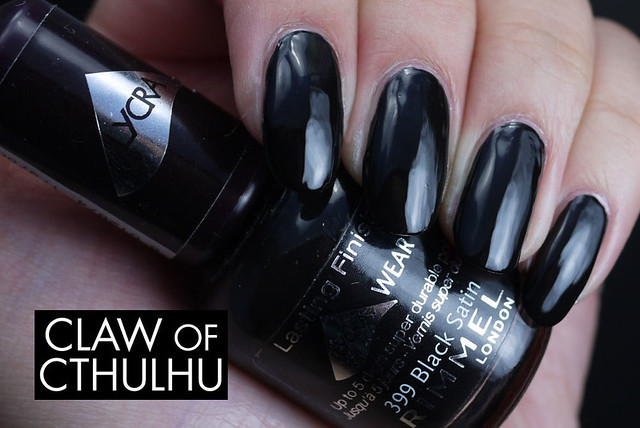
Rimmel Black Satin Swatch

This is a perfect black. The gloss finish and depth are great and seems to hold up in age as well. After 5 years, it hasn't gone goopy or overly thick. Never had to use thinner. The brush is sturdy for controlled strokes and isn't too skinny or too wide.

I believe you can find this polish at $5 at Shoppers Drug Mart but the bottle looks different now. It looks more cube-like. I can't recommend this polish enough.

Monday, 25 March 2013

Ozotic 505 Swatch

Whoops no Shitty Nail Art Monday today! When I was sick, I didn't get to paint my nails so I actually have only painted my nails once in three weeks! Yikes! So I'll keep burning off the back log here and I'll do this bonus Leibsters Award thing but I'll put that stuff at the bottom of the post.

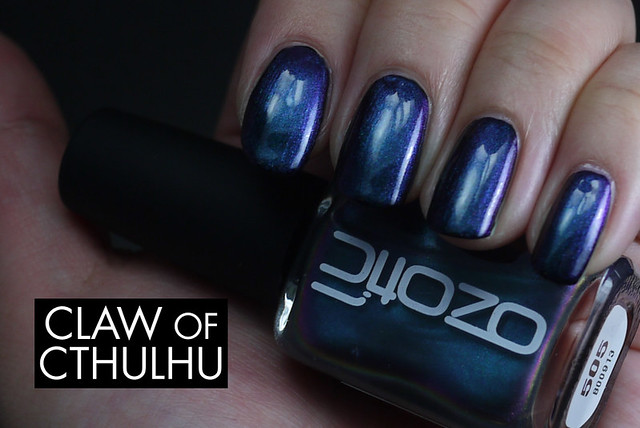
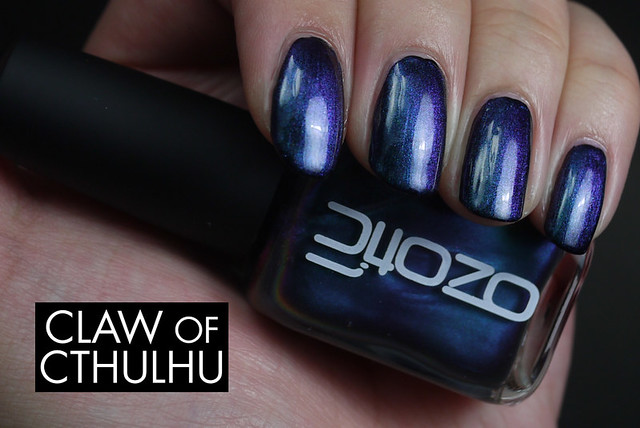
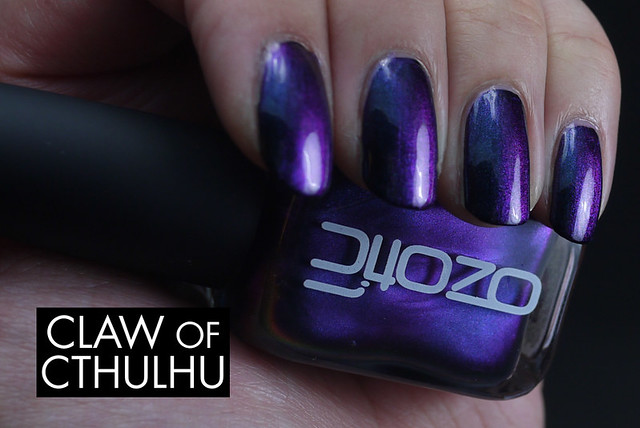
Today I've got Ozotic 505, which is a layering multichrome effect polish. Spoiler alert: It's fecking GORGEOUS. Unfortunately it's not a standalone polish, but layered over black, it's a whole lot of magic power. I used Cult Nails Nevermore for a one coat black so the polish isn't layered on thick. It was perfect. Ozotic 505 shifts from a navy shimmer to teal to violet to magenta and in the right light (which I couldn't get with my artificial light box light), a flash of lime and gold. It almost reminds me of an oil slick! (Yeah yeah, I'm guilty - as a kid, I was always fascinated with the colours of oil slicks!)

Ozotic 505 Swatch (over Cult Nails Nevermore)

Ozotic 505 Swatch (over Cult Nails Nevermore)

Ozotic 505 Swatch (over Cult Nails Nevermore)

Ozotic 505 Swatch (over Cult Nails Nevermore)

You can see a glimpse of the colour changing that occurs in the bottle as well.

Anyway, since I don't have Shitty Nail Art Monday for you, I'm going to participate in this "Leibsters Award" thing. The kind and cool Tami from Polished Dreams and Life Things gave me a shout out and before I didn't really participate in these things but now that I am following more than two blogs (haha), I can finally list off some folks. Also be sure to check out Tami's blog, her photos are getting better and better with every post! Here's the lowdown copypasta:

This award was designed to be a blog award in the "pay it forward" fashion. Once you've been nominated, you award it to five blogs that you like that have fewer than 200 followers, to encourage new visitors to visit these blogs.

The rules for accepting this award are:

You need to thank the person who gave you the award and link back to their blog. Post the award onto your blog. Give the award to five bloggers who you appreciate that have fewer than 200 followers. Leave a comment on their blog letting them know that you have given them this awesome award!


So here we go:

1 - My homegirl Caitlin over at Addicted to Lacquer (She has a stash not to be messed with and all around awesome taste. Also check out her Hoof Polish!)

2 - Another Canuck gal of mine, Chantal of Chantal's Corner (Top notch photos, helpful beauty reviews and really clean and great nail art)

3 - Fellow Redditor June of The Polish Fox (Awesome indie polish girl! Helpful swatches and all around good taste.)

4 - Fellow Rainbow Honey fangirl Kylie of Chicbananas (Again, awesome taste in indie polishes and all around kick-ass mom!)

5 - Aaaaand one of my newest followers Ellie at Moustache Manis (Her nail art completely slays me. I am totally in love!)

Anyway I guess you're supposed to tag people but I really just wanted to give some shout outs in lieu of crappy nail art! Hopefully next week, Shitty Nail Art Monday will be back!

Thursday, 21 March 2013

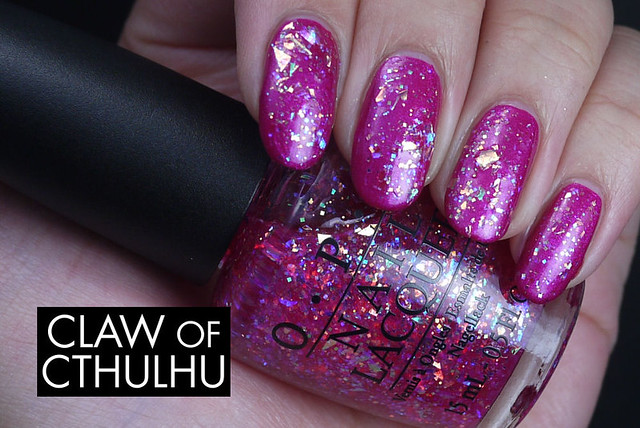
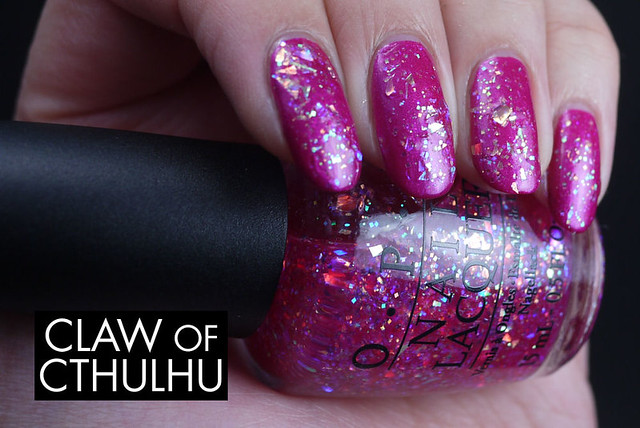
OPI I Lily Love You Swatch

One of the main reasons for me starting this blog was to swatch my entire collection to prevent myself from buying more. (Well, we all know how this has worked so far.) Nonetheless, here's another oldie but a goodie. I picked this up during my flakie phase of 2011 where I was searching high and low for something similar to Cult Nails' Unicorn Puke or Clairvoyant, which to this day, remains my top unicorn polish. I will never own that polish and it makes me sad.

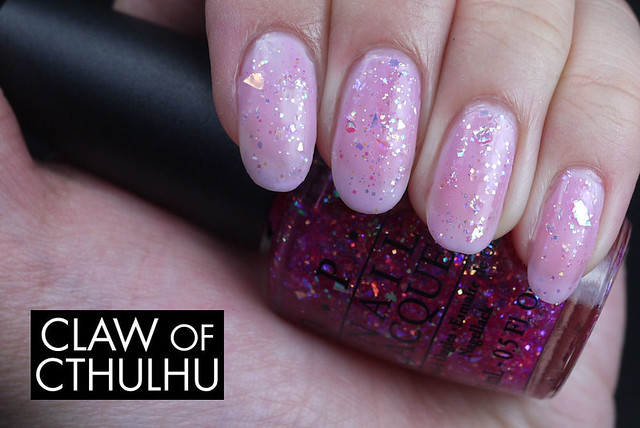
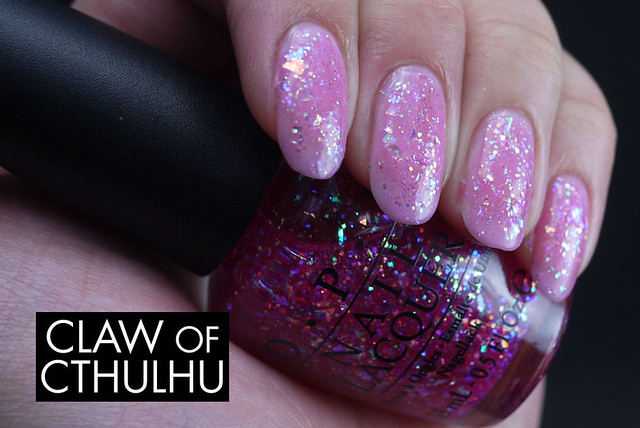
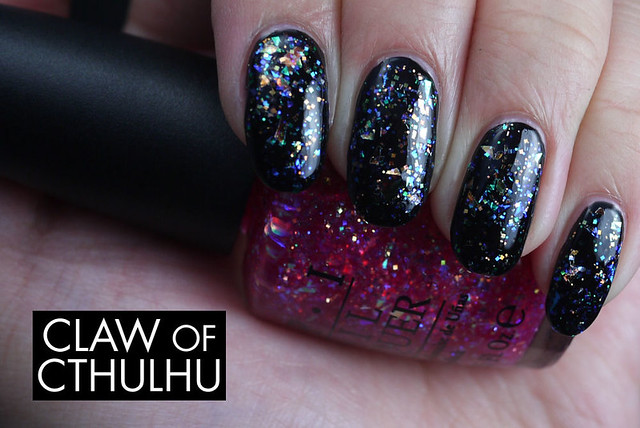
Anyway. During my flakie madness, I noticed that a lot of glitter polishes were trying to emulate the same flakie goodness. I called it "shard glitter", because it looks like the same shape of glass shards. One of the polishes I picked up, mistaking for flakie goodness is OPI I Lily Love You from the Nice Stems collection. Despite it lacking the look I desired, it's still very cool for what it is. I Lily Love You is a Barbie pink jelly immersed with multi-sized opalescent broken up shard and square glitter. It's definitely a layering glitter and like flakie polishes, it looks extra hot with a matte top coat.

Here's OPI I Lily Love You over OPI Alpine Snow. One coat:

OPI I Lily Love You Swatch (over OPI Alpine Snow)

Two coats:

OPI I Lily Love You Swatch (over OPI Alpine Snow)

Here's OPI I Lily Love You over OPI Flashbulb Fuchsia:

OPI I Lily Love You Swatch (over Flashbulb Fuchsia)

OPI I Lily Love You Swatch (over Flashbulb Fuchsia)

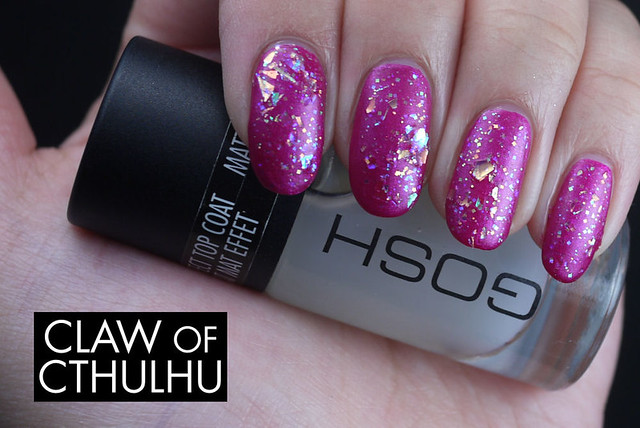
And of course, with GOSH's matte top coat:

OPI I Lily Love You Swatch (over Flashbulb Fuchsia)

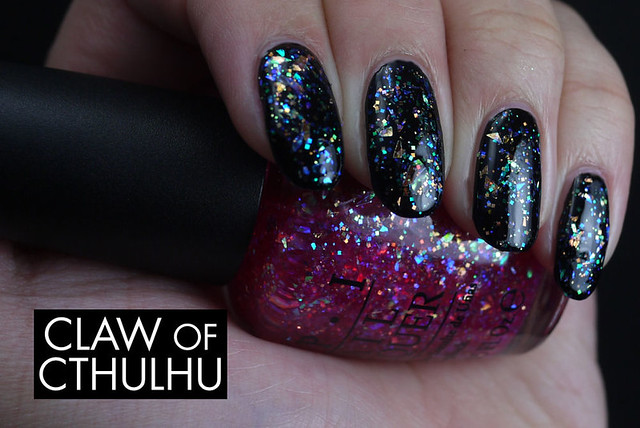
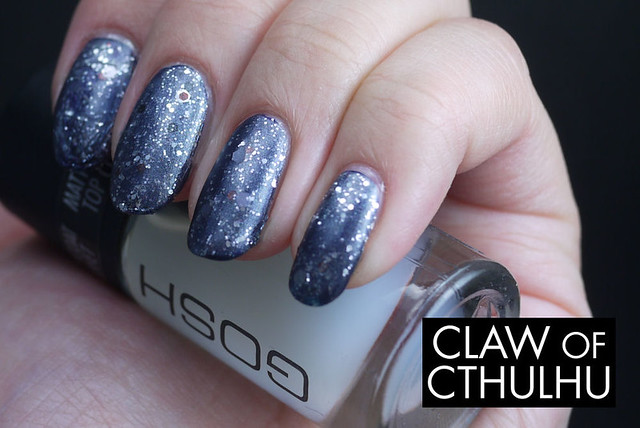
To really showcase the kind of glitter (and all its magic!) in OPI I Lily Love You, layering it over a black polish like Quo by Orly Little Black Dress really brings out all the crazy colour shifts you get:

OPI I Lily Love You Swatch (over Quo by Orly Little Black Dress)

OPI I Lily Love You Swatch (over Quo by Orly Little Black Dress)

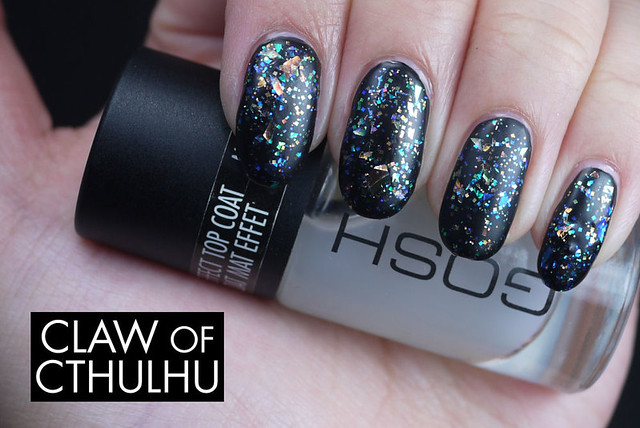
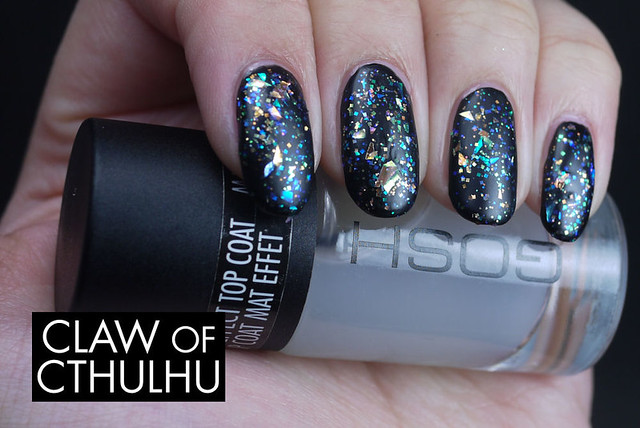
And here's the magic frozen in just the right light due to a nice GOSH matte top coat:

OPI I Lily Love You Swatch (over Quo by Orly Little Black Dress)

OPI I Lily Love You Swatch (over Quo by Orly Little Black Dress)

The colours somehow remind me of that wizard koopa you'd encounter in the castles of Super Mario World on SNES. Ahhhh video games. Plenty of top coat is needed as the shards stick up from the polish. Definitely no taco glitter, but still a prominent edge like say, a heart glitter or something. I did a quick look on eBay and apparently OPI I Lily Love You is being sold for $17+. It's a cool polish but in my humble opinion, not worth that premium. Might as well pick up China Glaze Luxe and Lush.

Wednesday, 20 March 2013

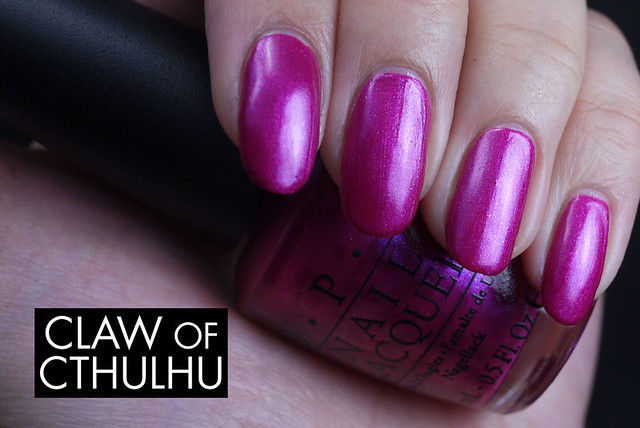
OPI Flashbulb Fuchsia Swatch

Finally back at work. I enjoyed watching Mulan and Tangled from the couch but it's just nice to be able to breathe and do things on my own again. I was so sick for so long. I never want to be that sick again. I haven't even done my nails more than once in the last couple of weeks. Now you know how sick I am! Ha!

Anyway, here's OPI Flashbulb Fuchsia. I got this one from my friend in the states - a male! Hahaha, I love it when dudes give me nail polish. It's like they don't even know that it's the best present ever. I actually haven't seen this polish before and he told me he sent me one US exclusive polish but I don't think this one is it. It's from OPI Brights collection - I... don't know much about this collection and couldn't find much info. Let me know if you know the low down on these.

OPI Flashbulb Fuchsia Swatch

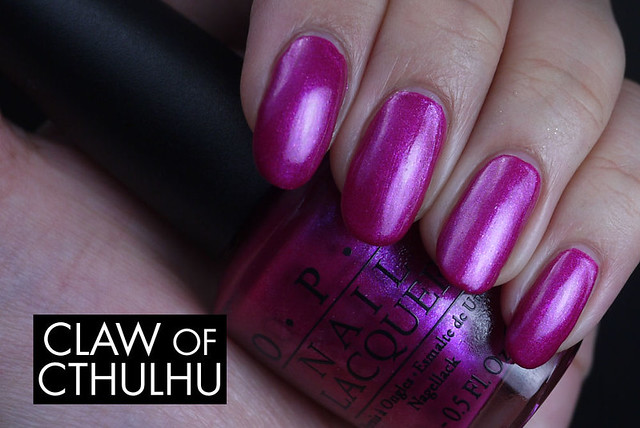
This formula was pretty good. I rarely find OPI formula finicky. (Man, I'm such an OPI fangirl.) Flashbulb Fuchsia is a rich shimmery fuchsia, a bit cold in tone though. It doesn't possess any exciting qualities like duochrome - it's just a basic bright fuchsia with a nice even shimmer. Here it is in two coats.

OPI Flashbulb Fuchsia Swatch

Probably not for me to wear alone but I could totally envision doing some fun contrasted black and fuchsia nail art. I also have nothing like this in my collection so that's also a bonus!

Tuesday, 19 March 2013

Joe Fresh Cherry Swatch

Alright, burning off the backlog. I wish I posted these sooner when I actually did them because my nail length is horrifying, haha. So uneven and ugh, it was when I was still using that wretched white background. Glad I switched to black. Anyway, it's Cheap Polish Tuesday where we explore polishes that we can find on sale or regular price for $5 or less! Again, today we've got a Joe Fresh polish from Superstore, a Canadian grocery chain up here in Canada. You can find them for $4 a pop, or save a bit of change and buy them for 3 for $10.

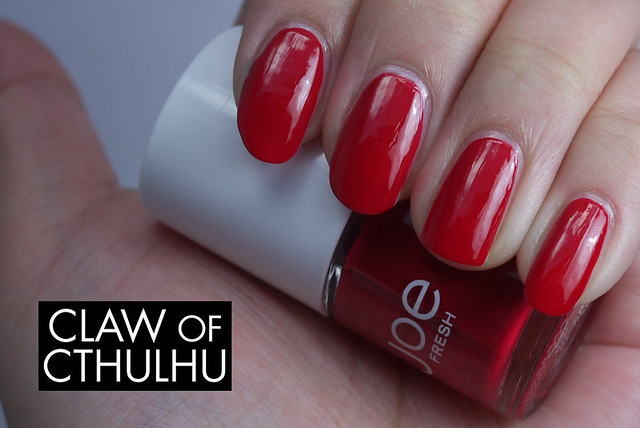
Again, sorry - this is an older photo of my nails so they are a bit shorter. This formula is super smooth and slick. Again, I love the Joe Fresh polish brush as it's short and wide. This is not a popular opinion but it definitely works for me! I used two coats for my swatch.

Joe Fresh Cherry

I love all the Joe Fresh polishes I own. They were even my first flakie polish! (But I'll get to that at another time.) They offer a huge selection of basics and I haven't had any problems with their formula. I've already done the calculation on this cheap polish and because of the small 6ml, getting a single 15ml bottle of OPI polish will cost about the same! However, it's all about palette and if you want a choice of colours, I'd recommend Joe Fresh as a possible winner.

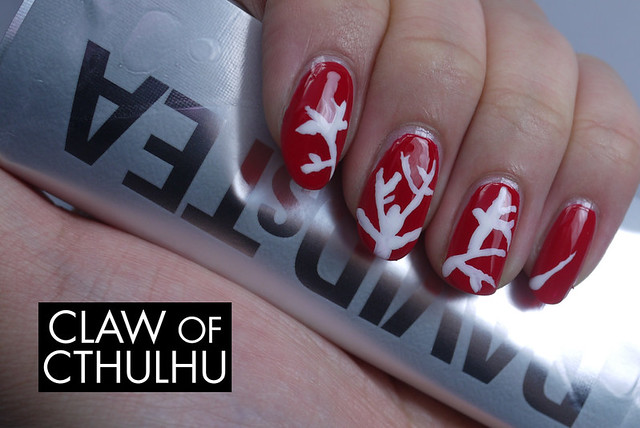
It's the same red I used for my DAVIDsTEA Holly Red Winter Tree Perfect Mug inspired nail art:

DAVIDsTEA Perfect Mug Inspired - Holly Red Winter Tree

Anyway, that's all! Short and sweet today. If you haven't checked out yesterday's post, please do! I actually spent a lot of time on that damn rose art and dare I say that I like em and am proud? I hope that gives me hope that I can maybe do nail art that I will like myself one day.

Monday, 18 March 2013

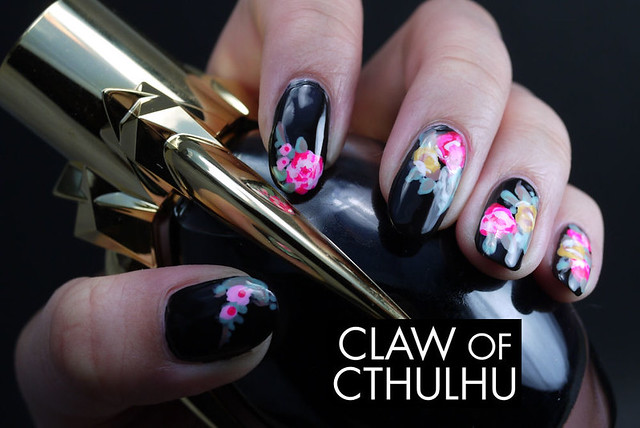
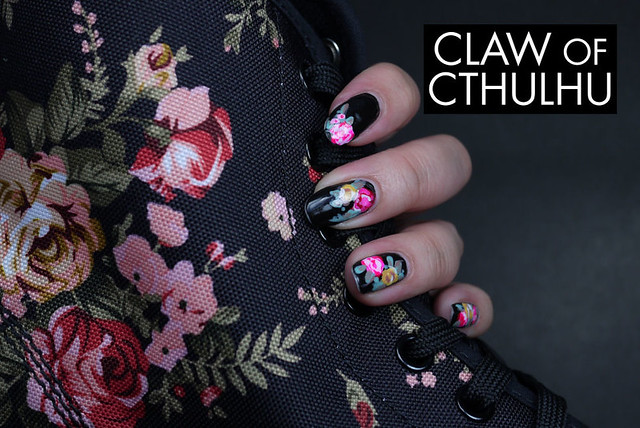
Black Victorian Rose Doc Martens Inspired Nail Art

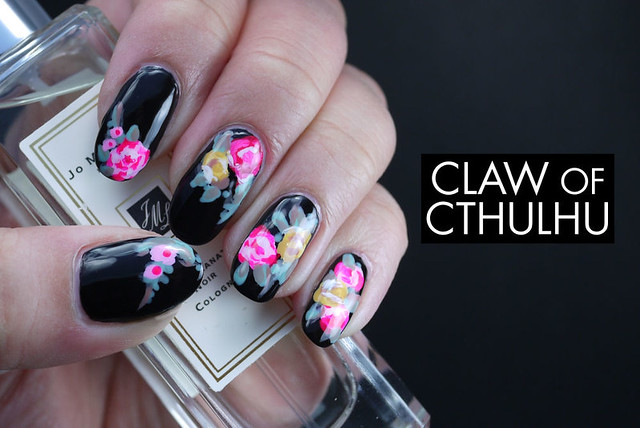
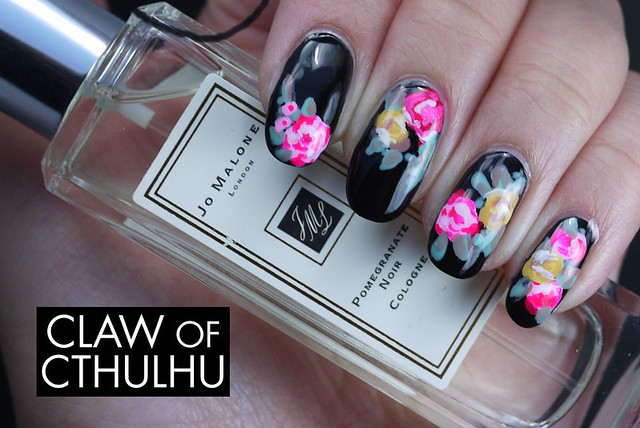
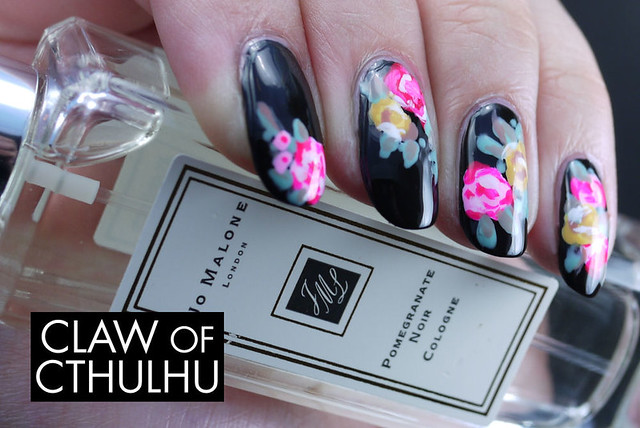
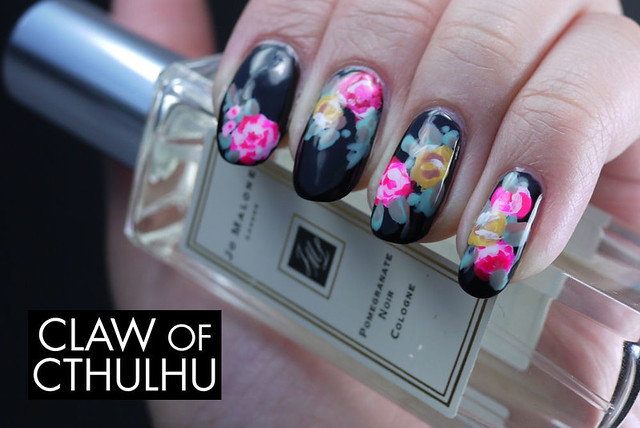
I think I am almost better. The fevers are gone, the weakness is gone... But the shallow breathing and cough attacks are still here - nonetheless, I'm still here! Today I have some black Victorian rose Doc Martens inspired nail art, shamefully taken from Chelsea King of "Chelsea's Get Nailed". (I still can't help but think dirty thoughts when I read the name of her blog, hahaha.) Hers are a lot more refined, neater and just generally superior to mine in every way but you know... For a Shitty Nail Art Monday... I gotta admit: I kind of like these!

Black Victorian Rose Doc Martens Nail Art

I have actually been eyeballing these Doc Martens since I saw them last summer but was too cheap to pick them up at the time. By the time I was going to get serious about getting them, they were gone. I scoured online websites and eBay but no luck. I actually ended up getting them in the Shoreditch style which is OK because they match my limited edition Sanrio Doc Martens as well!

Supplies Used For Black Victorian Roses Doc Martens Nail Art

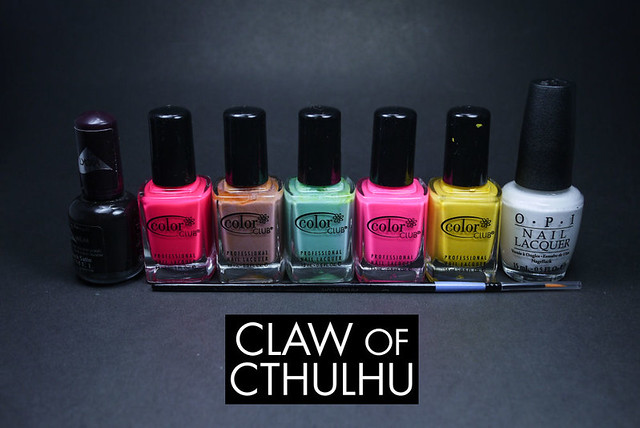
For this nail art, I used Rimmel Black Satin for the base, and Color Club Warhol, Color Club Earthy Angel, Color Club New Bohemian, Color Club Poptastic, Color Club Almost Famous and OPI Alpine Snow. I used to buy Color Club sets at Winners because they were cheap but haven't really used them. Definitely great for expanding my palette for nail art. I used a longer thin brush that I got from Michael's. The colour isn't bang on with the original black Victoria rose print but it still created a really nice look and consistency.

This took a lot of patience. This hand took me a total of 45 minutes. It's also probably due to me being a total n00b. I followed Chelsea's tutorial for the most part and then used her original post as a reference. (Her tutorial only had pink roses rather than pink and yellow.) I think the trick here is to used a light amount of polish on the brush. I tend to put on too much and it becomes a mess. I had no idea nail art roses were so simple to do. They are literally blogs with smaller "C" lines in the middle. But again, it's a matter of less is more and having different colours to help bring out the shape and shadows helps as well.

Black Victorian Rose Doc Martens Nail Art

Black Victorian Rose Doc Martens Nail Art

Black Victorian Rose Doc Martens Nail Art

Black Victorian Rose Doc Martens Nail Art

These are actually still my current nails, haha. I did them a week and a half ago! I guess that's what happens when you're sick. Also here's an adventure of my perfume collection. I have Lady Gaga's Fame Black Fluid and Jo Malone Pomegranate Noir from my BFF who now lives in London (damnit I miss her). (Apparently, just sell me anything with "black" and I'm there.)

And because I wasn't joking about being obsessed with this print, I actually went ahead and ordered the shoes online. Here's my nail art maybe a week after. A little tip wear but you get it.

Black Victorian Rose Doc Martens Nail Art

Alright, I hope that was fun for a Shitty Nail Art Monday! But again, I actually sort of like these! They could have been done better but alas, it is what it is.

Friday, 15 March 2013

Hoof Polish Puckzilla Swatch

Well it's official: I have bronchitis. Rocking the anti viral pills and not one but TWO inhalers!!!... But honestly, I feel like death and I had to cancel out of a huge event on Saturday. It was really upsetting for me to have to do but I can't sacrifice my own integrity as well as the event's. It just looks bad. However I feel bad because I feel like I look unreliable. Sigh, luckily my lead is a cool guy and totally understands.

Anyway, today I've got the last of the Hoof Polishes that Caitlin from Addicted to Lacquer created and kindly sent over. Here's a link to the back story and inspiration in case you haven't checked it out!

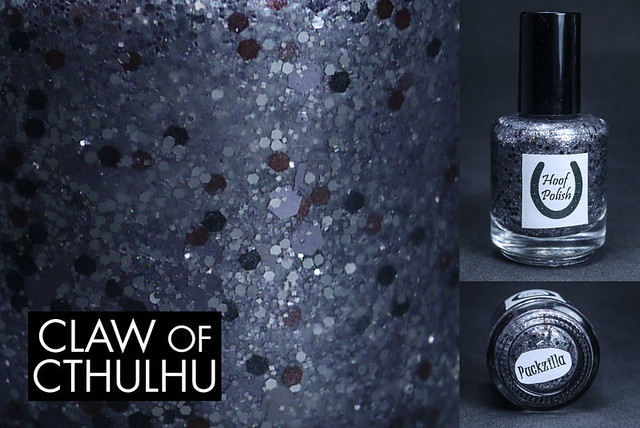
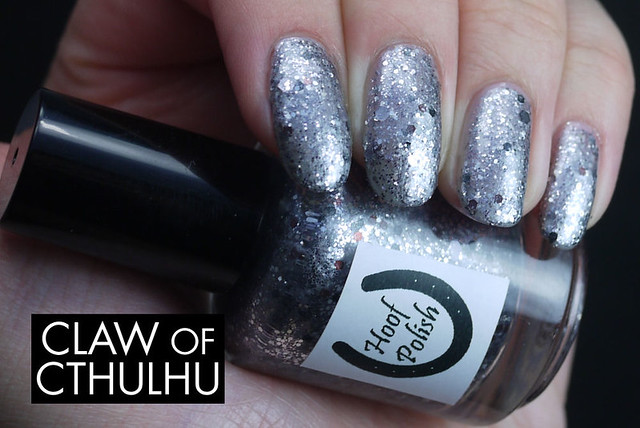
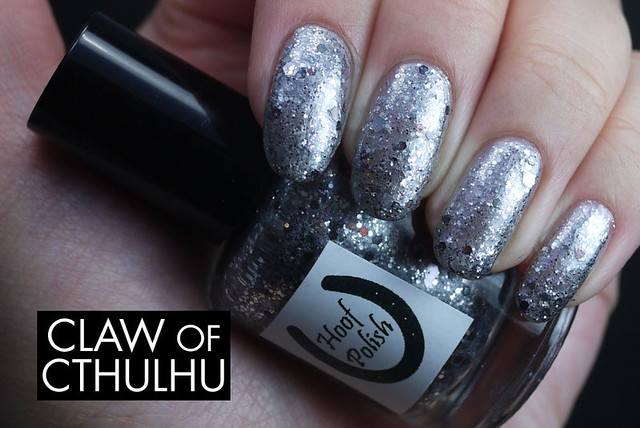
So I decided to save my fave for last... Hoof Polish Puckzilla. It looked simple in the bottle but wearing it breathed so much life into it. Puckzilla is comprised of a silver base, cobalt gunmetal multisized glitter and speckled black and brown glitter. Originally I was going to attempt to layer it over top of Essie No Place Like Chrome but it was unnecessary because it was actually so dense on its own!

Hoof Polish Puckzilla Bottle and Macro

Here's Puckzilla on her own. Isn't it freaking gorgeous? Remind me of ice queen nails.

Hoof Polish Puckzilla

Hoof Polish Puckzilla

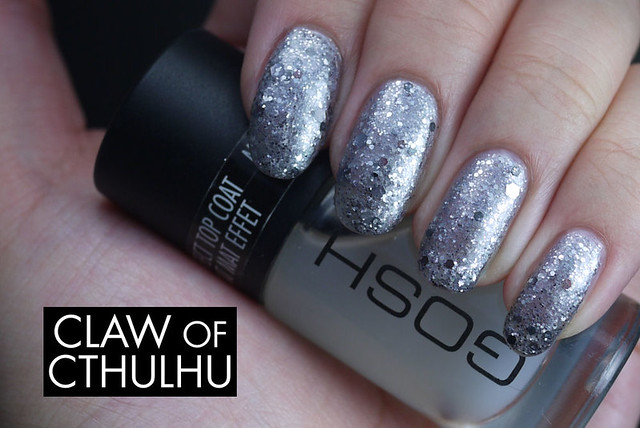
Using a matte top coat didn't seem to do much because it's so freaking shiny. It can't be tamed!

Hoof Polish Puckzilla

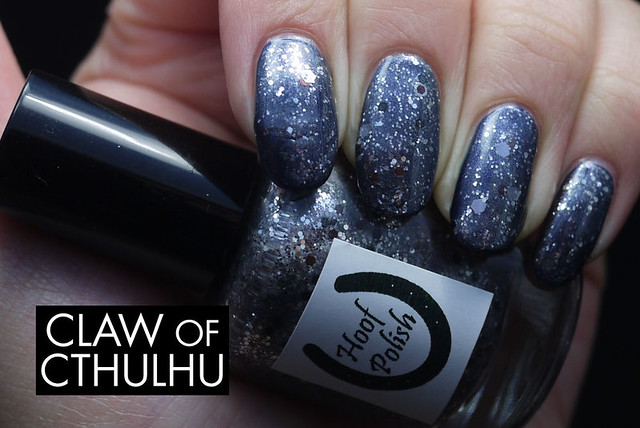
I decided to test the waters to see how it would act as a layering polish. I layered one coat of Puckzilla over top of OPI Russian Navy. Although I love it, you have to be a little careful because it might look streaky depending on your application. Luckily Puckzilla has some great coverage so I didn't have any bad luck on that front. I love it like this.

Hoof Polish Puckzilla over OPI Russian Navy

Hoof Polish Puckzilla over OPI Russian Navy

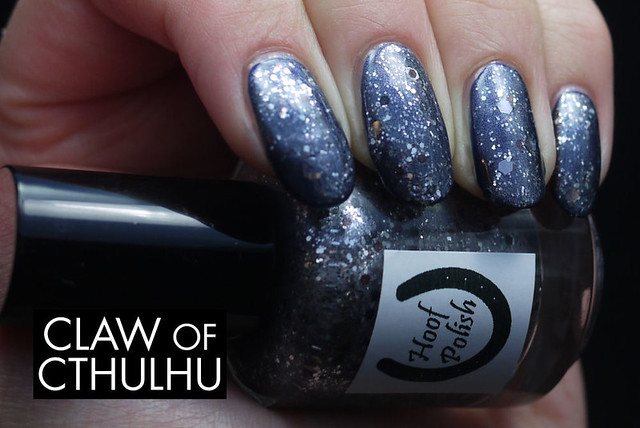
And finally, a matted version:

Hoof Polish Puckzilla over OPI Russian Navy

I like it this way because it really highlights the black and brown glitter.

Anyway, usually I am the queen of verboseness but I'm going to cut it off here. Sorry I've been behind on my blog reading. I promise I'll check out all the great posts you've all made in the last couple of days. I just can't really move right now and I'm dying. Ugh.

Thursday, 14 March 2013

Hoof Polish Just One More Time Swatch

A couple of notes here: 1) I am totally dying right now and I am certain I have bronchitis. Unfortunately the clinic doesn't open for another couple of hours so I figure I'll post here to kill some time. I kind of want some pancakes but I'm most likely to throw them up. Not a happy camper. 2) Did you see the update OPI posted on their Facebook page regarding the whole When Monkeys Fly! drama? Well, they owned up to seeing customer dissatisfaction and offered to send another polish from the Oz collection. I just submitted my request so I hope they answer it. I chose to grab Don't Burst My Bubble since you know my big love for sheers.

Moving along, I have another polish from Caitlin over at Addicted to Lacquer. It's the first run of Hoof Polish and again if you haven't read the back story and inspiration, please do!

Hoof Polish Just One More Time Bottle Macro

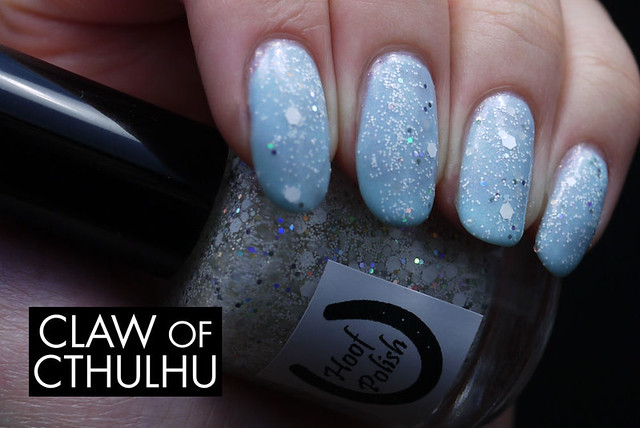
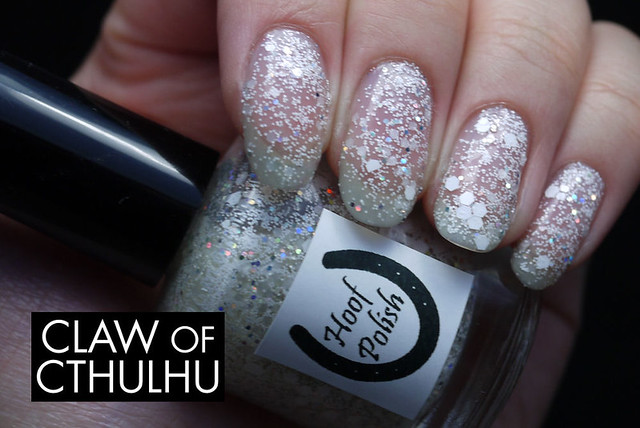
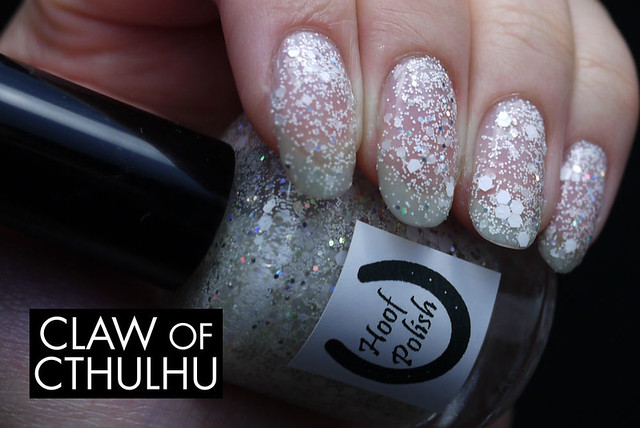
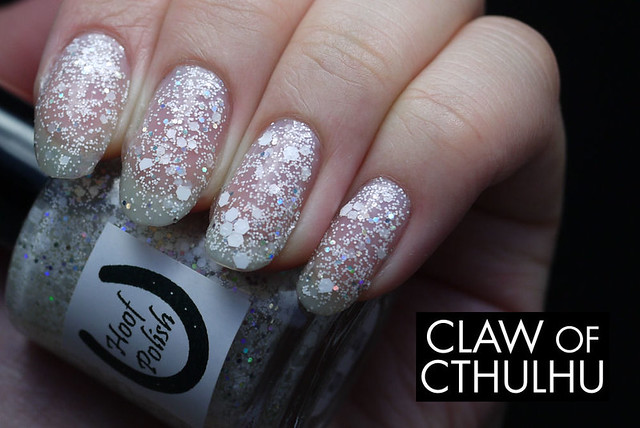
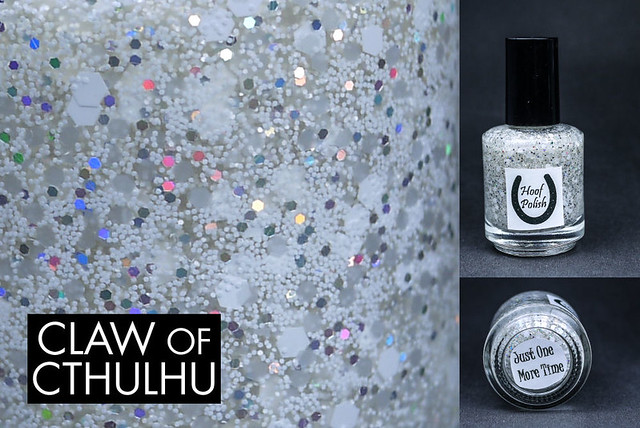
Today I'm looking at Hoof Polish Just One More Time, a white glitter topper. I've always wanted a solid glitter topper ever since the blow out with the popular Lynderella Sticks and Stones clones but never got around to it. This one is definitely packed, not sparse like for example Nubar White Dots or OPI Pirouette My Whistle. Just One More Time is more unique - comprised of a dense saturation of smaller solid white glitter that are reminiscent of sugar grains, white and pearl hex glitters, and some mid-sized holographic glitters just to keep you on your toes. Unlike Rock Afire, Just One More Time was a little easier to work with in regards to finding some good matches to pair it with.

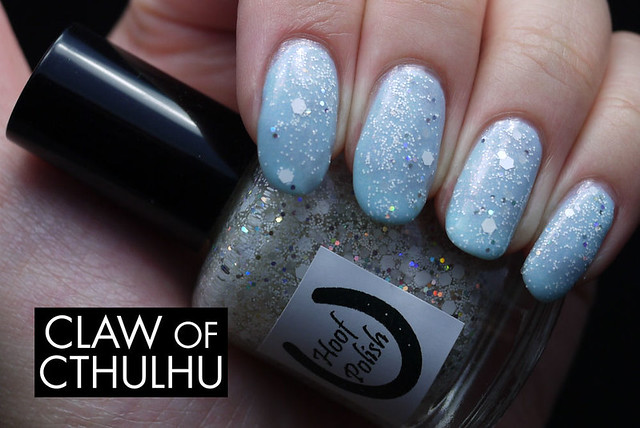
Obviously the first thing I thought of when I saw this polish was snow, so I wanted to create that perfect snow day look. I used Sinful Colors Cinderella. I only needed one coat of Just One More Time as the glitter density is fairly generous!

Hoof Polish Just One More Time Swatch (over Sinful Colors Cinderella)

Hoof Polish Just One More Time Swatch (over Sinful Colors Cinderella)

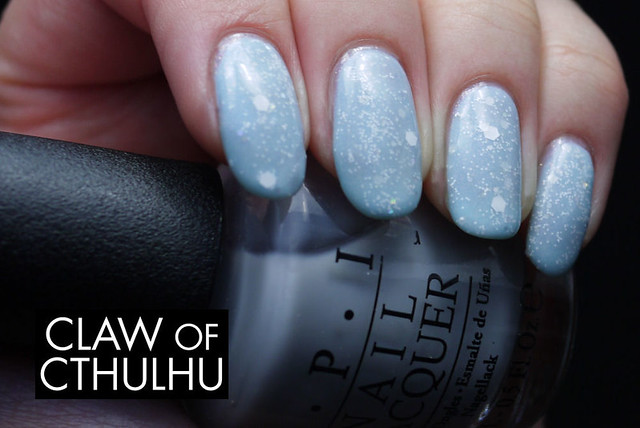
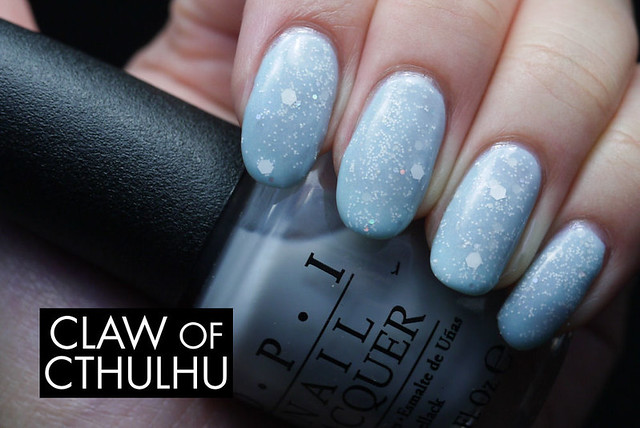
I figured I'd experiment a bit and see if I could layer a sheer on top to make the contrast a little more subtle. I used OPI My Pointe Exactly to tone down the contrast. I'm not entirely sure if I like it or not but if you're going for more of a subtle look, this would be how to do it.

Hoof Polish Just One More Time jelly sandwich (over Sinful Colors Cinderella)

Hoof Polish Just One More Time jelly sandwich (over Sinful Colors Cinderella)

I kind of went against Caitlin's rules of not wearing it over white. Her swatches are perfect already so I didn't want to copy it completely. For funsies, I swatched it alone. I think she might kill me though, haha. But having never owned a polish with solid glitters, I just wanted to see what it looked like!... It looks like I've been playing in the snow.

Hoof Polish Just One More Time Swatch

Hoof Polish Just One More Time Swatch

Hoof Polish Just One More Time Swatch

I think it looks OK but I can see that it's not the prime choice and how a white polish would actually be perfect for it. (Sometimes you just gotta learn from your own mistakes!)

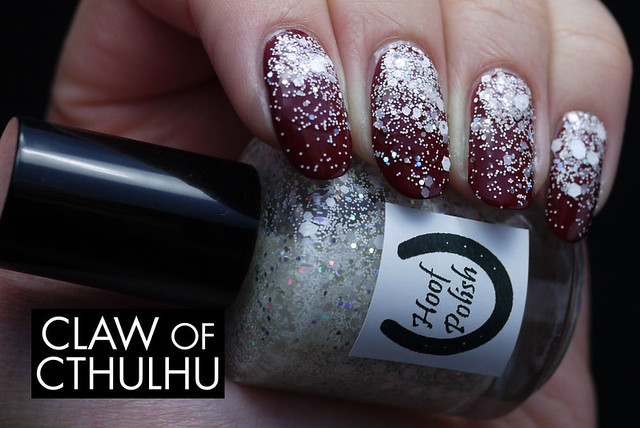
I decided I would also take the opportunity to try something I've never tried before: a glitter gradient. I have been looking for another excuse to pull out OPI Skyfall since I was unhappy with my last swatch since I was rocking nubs back then (don't look). I figure Skyfall had that right deep burgundy to pop enough contrast to pull it off and so I tried it:

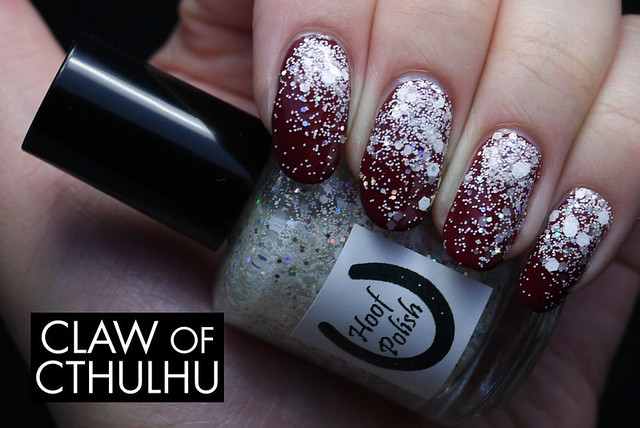
Hoof Polish Just One More Time Swatch (gradient with OPI Skyfall)

Hoof Polish Just One More Time Swatch (gradient with OPI Skyfall)

I think my... intentions were good but again, as you know from Shitty Nail Art Mondays, a lot of things are wayy better in my head than how it's actually executed. I guess from afar it would look OK, but I know it could definitely be done better and that's just my mediocre application skills. As for final thoughts - I really can't get my mind off this snow thing, so I really think Caitlin was onto something when she recommended to layer it over white. I think my Sinful Colors Cinderella was also a good pairing in the same spirit.

As a note, my Google+ and Facebook posts don't seem to be posting the thumbnails for my links anymore. Not entirely sure why. I've always ran this blog off of Blogger with the images over at Flickr. Nothing has changed. Anyone have any idea on why that might be? Ah well, it's just a bit bothersome. (Yay they seemed to have fixed themselves!) Anyway, time to finish up today's posts and then haul my butt over to the clinic. I hope it's something that can be tamed in the next 48 hours. Sigh.